Trial Manager
Trial accounts are temporary, limited-access user accounts designed to allow new users or organizations to evaluate the CMP platform before committing to a paid subscription. These accounts provide a controlled environment with restricted resources for a set period.
Activating Trial Manager
The Trial Manager is a dedicated module within the Cloud Management Portal that enables administrators to manage and monitor trial accounts. This feature allows potential customers to explore cloud services while ensuring resource limitations are in place before they transition to a full production workload.
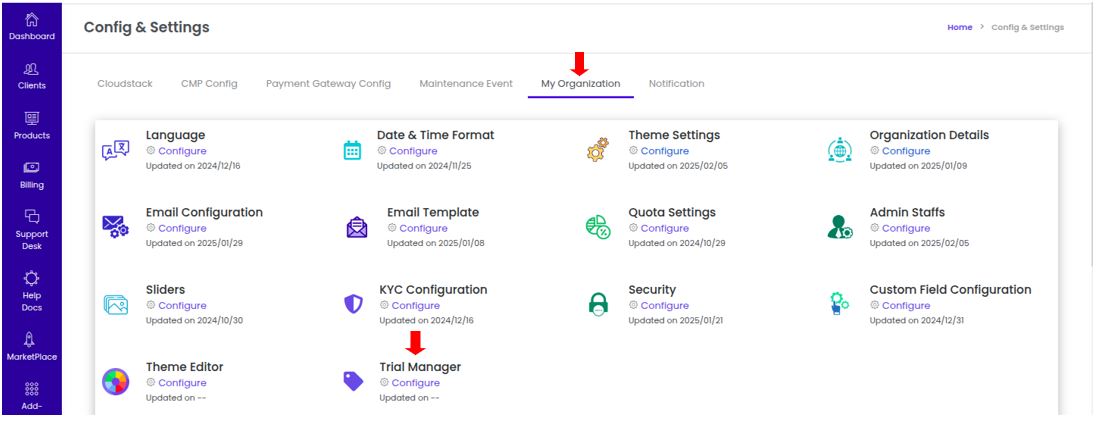
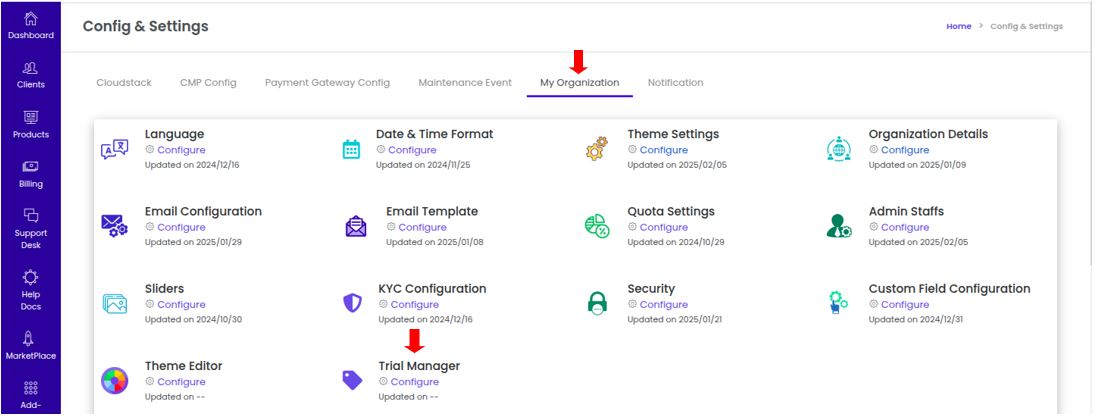
1. Navigation to Trial Manager Feature:
-
Login into the admin portal.
-
Navigate to the Config section by clicking on the Config icon in the portal menu.
-
Under My Organization section, click on the Trial Manager link.
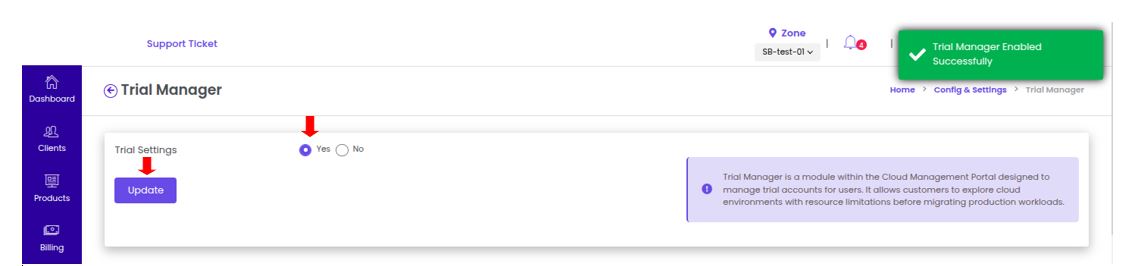
2. Enabling Trial Manager:
- Set the "Trial Settings" option to "Yes"
- Click the "Update" button to activate the trial management feature.
3. General Configuration of Trial Settings:
Admins can customize the trial settings based on business requirements.
-
Enable Trial Option in Signup [Optional] : - When enabled, this allows customers to opt for a trial account during signup. The trial provides temporary access to the platform with predefined resource limitations for evaluation purposes.
-
Trial Period in Days [Mandatory] : - Define the duration of the trial (e.g., 7, 14, or 30 days). This ensures users have adequate time to explore the platform before deciding to upgrade to a paid plan.
-
Payment Verification [Optional] : - This ensures that users undergo a payment authentication process before accessing cloud services. It helps prevent misuse of trial accounts and ensures that only valid customers can activate a trial.
-
KYC Verification [Optional]: - This option requires users to verify their identity by submitting Know Your Customer (KYC) documents. It helps maintain security and compliance by ensuring trial accounts belong to genuine users.

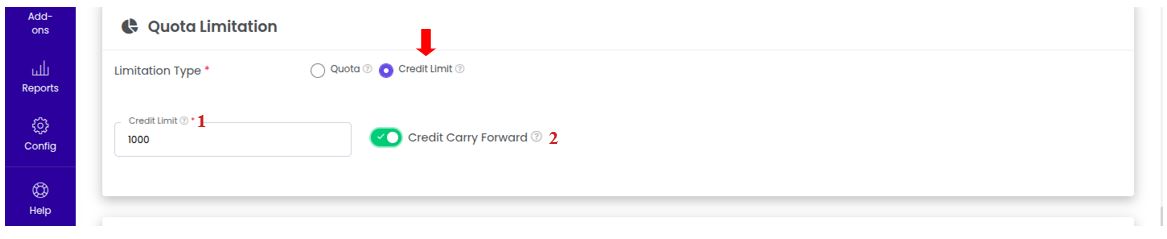
4. Quota Limitation in Trial Settings:
To prevent overuse of resources, CMP offers two types of limitations for trial accounts. They are: Quota Type Limitation and Credit Type Limitation.
-
Quota Type Limitation : Admins can configure predefined resource quotas for trial accounts.
For example, Limit compute instances to 2 VMs, 10 GB storage, and 2 vCPUs per user.
-
Credit Type Limitation : Set a maximum credit value that a trial account can consume.
- If Credit Carry Forward enabled, any unused trial credit will be transferred when the user upgrades to a paid account.
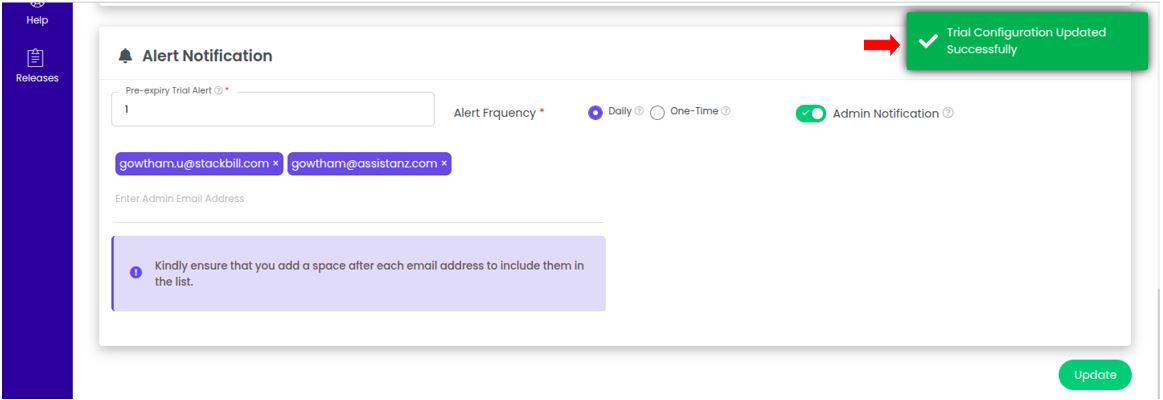
5. Trial Expiry and Alert Notifications:
To ensure users are informed about their trial status, the Trial Manager includes automated notifications.
-
Pre-Expiry Trial Alert [Mandatory] : Sends notifications to trial users before their account expires. Helps prevent service disruption and encourages conversion to a paid account.
-
Alert Frequency [Mandatory] :
- Daily : - Users receive reminders every day until the trial ends.
- One-Time: Users receive a single alert notification before expiry.
-
Admin Notification [Optional]: Enter an email address to notify admins about trial expirations. Multiple email addresses can be added by inserting a space between them.
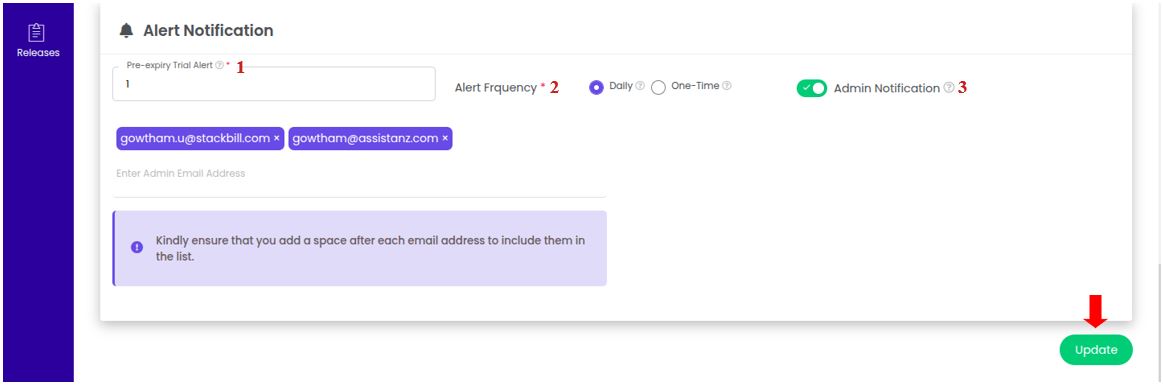
6. Finalizing Trial Configuration:
- Review all configured Trial Settings
- Click "Update" to save and apply changes
- A confirmation message will appear: "Trial Configuration updated successfully."
Managing Free Trial Accounts in the Cloud Management Admin Portal
The Admin Portal provides a structured approach to managing free trial accounts for users, enabling administrators to create, update, convert, suspend, and resume trial accounts efficiently.
1. Navigation to Trial account creation:
-
Login into admin portal.
-
Navigate to Clients > Create & Manage User Accounts > Add Client
-
Activate the "Enable Free Trial" option during user account creation.
-
Fill in all mandatory fields, such as the user’s email, organization details, and trial duration.
-
Click the "Add" button to finalize the creation of the new trial account.
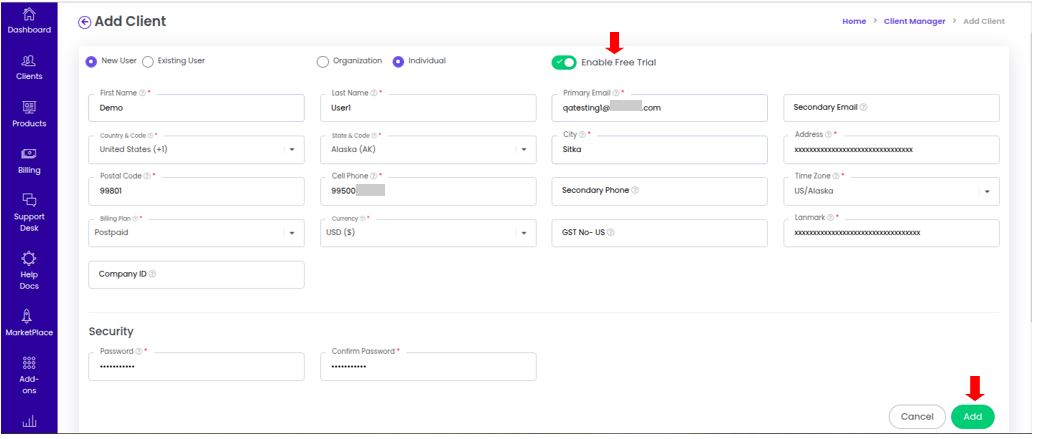
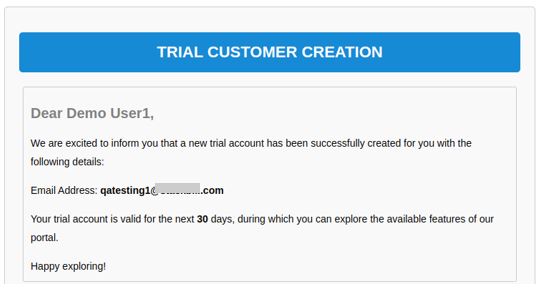
- The trial account is created successfully.

- The user receives an email confirmation about their trial account activation.
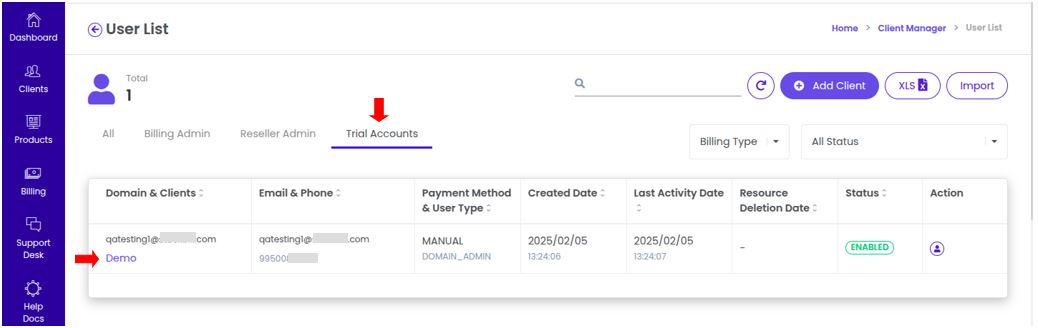
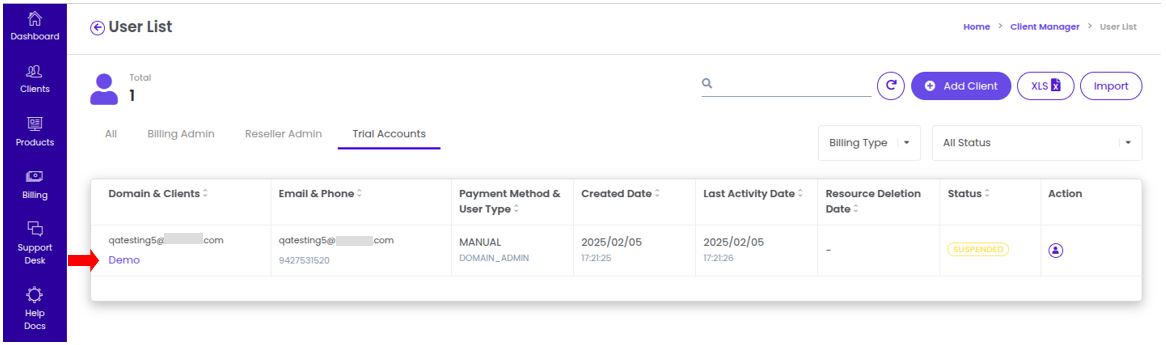
2. Viewing the List of Trial Accounts:
- Admins can track all active trial accounts by navigating to Clients > Create & Manage User Accounts > Trial Accounts
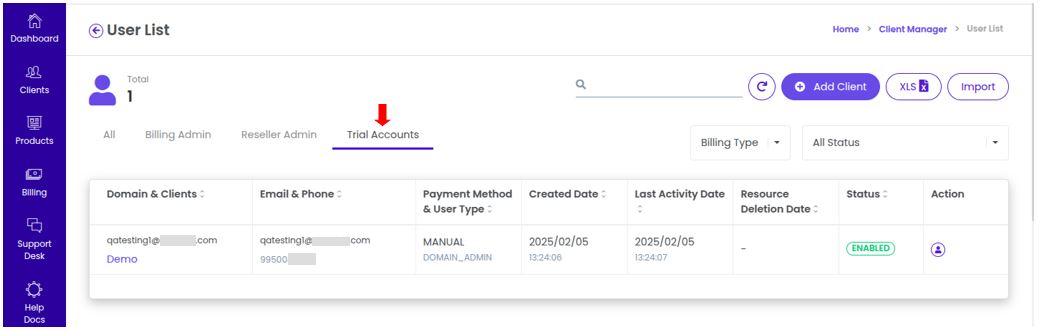
- This section displays a list of all trial users and their current status.
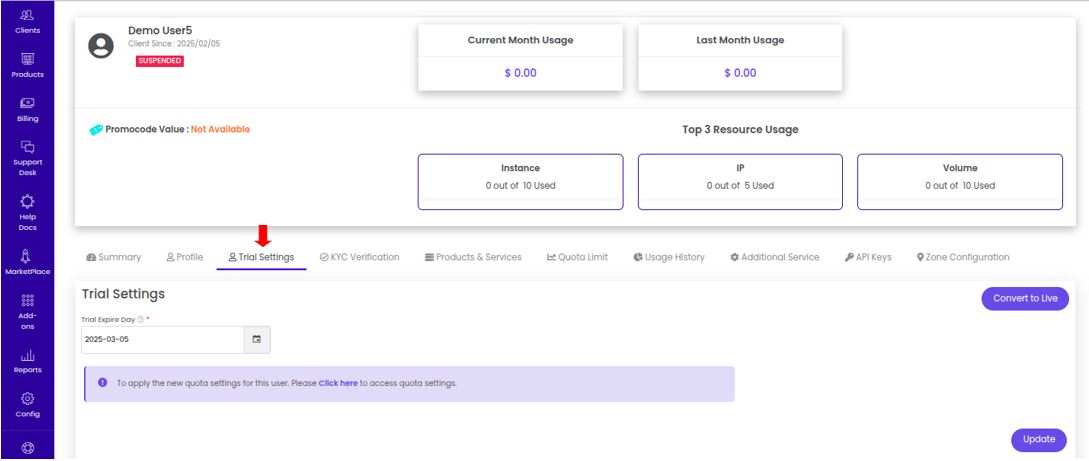
3. Updating Client Trial Settings:
- To modify an existing trial account’s settings navigate to Clients > Create & Manage User Accounts > Trial Accounts
-
Select the Client Account to Modify.
-
Go to the "Trial Settings" Tab.
-
Admins can update the trial expiry date, credit limits, and resource quotas for a specific client.
-
Click the "Update" button to apply the new settings.
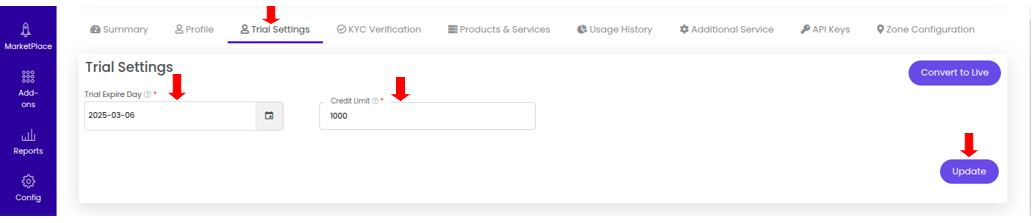
- A confirmation message appears: "Trial account configuration updated successfully."

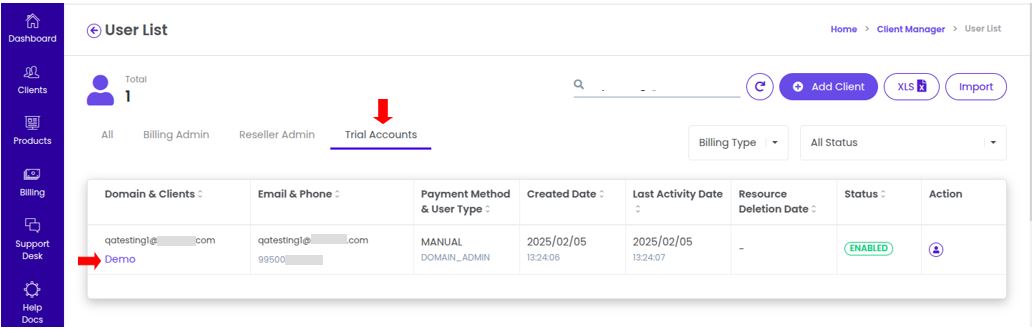
4. Converting a Trial Account to a Live Account:
- To upgrade a user from a trial to a fully active paid account, Navigate to Clients > Create & Manage User Accounts > Trial Accounts
-
Select the Client’s Account
-
Go to the "Trial Settings" Tab
-
Click the "Convert to Live" Button
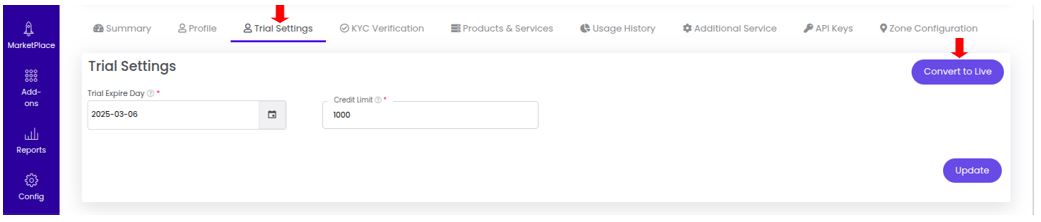
- Click the "OK" button to proceed.
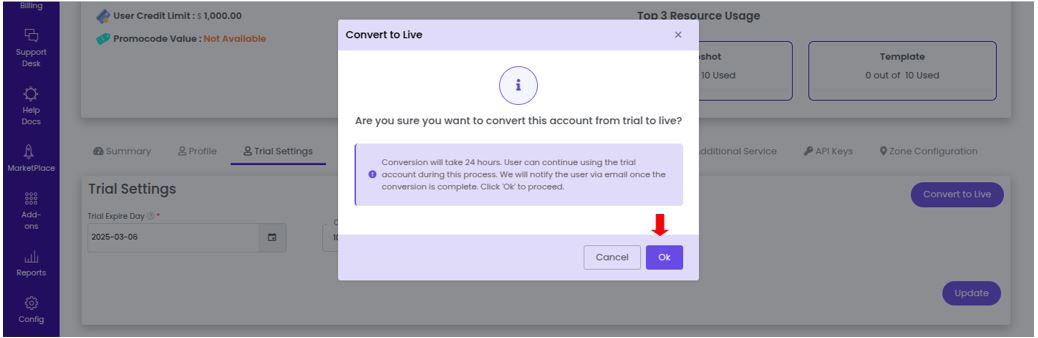
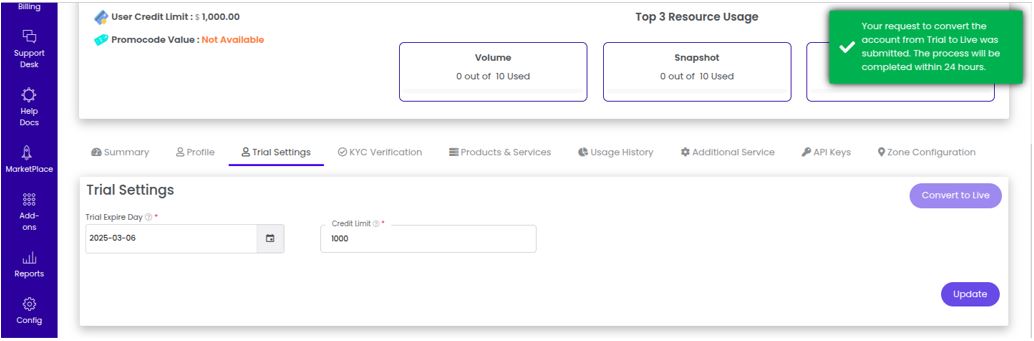
Important Note: Conversion takes 24 hours to complete. The user can continue using the trial account during this process. Once the conversion is successful, the user receives an email notification.
- A confirmation message appears Request to convert the account from trial to live has been successfully submitted.
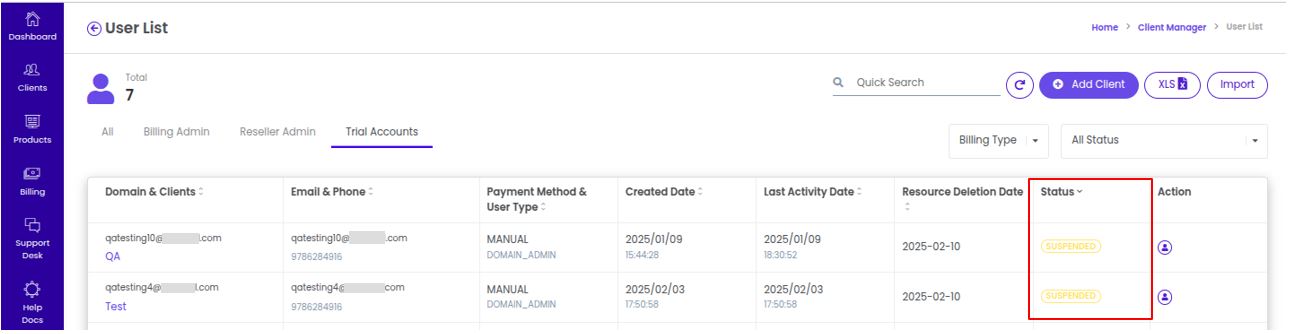
5. Trial Account Suspension:
A trial account will be suspended automatically once it reaches its expiry date
-
Navigate to Clients > Create & Manage User Accounts > Trial Accounts
-
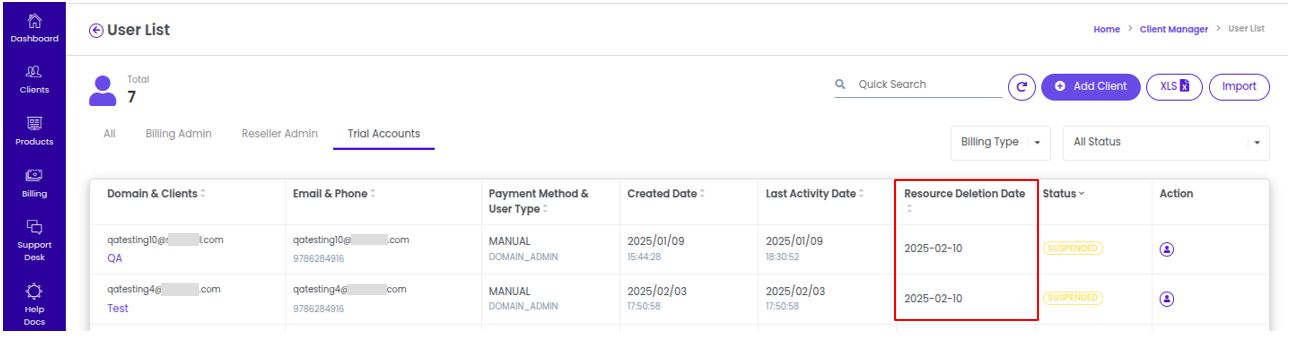
Suspended trial account resources will be permanently deleted once they reach the scheduled resource deletion date.
6. Resuming a Suspended Trial Account:
-
If a trial account is suspended but requires reactivation, Navigate to Clients > Create & Manage User Accounts > Trial Accounts
-
Select the suspended account.
- Go to the "Trial Settings" tab.
- Change the Trial Expiry Date and click Update.
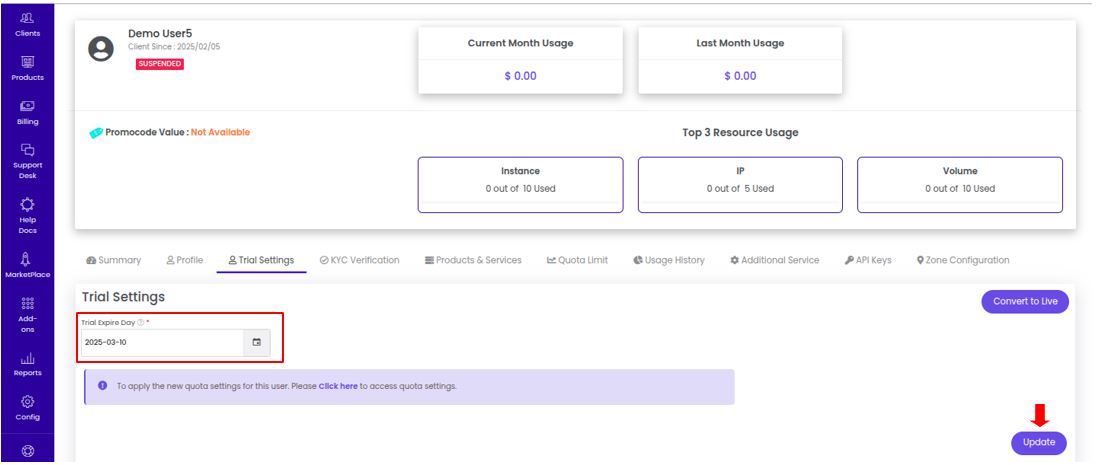
- A confirmation message appears as " Trial account expiry date has been updated successfully "

7. Reactivate the Suspended Account:
-
Navigate to Clients > Create & Manage User Accounts
-
Select the suspended account.
-
Navigate to the Client Detail Summary Page.
-
Click "Resume User Account."

- Confirm and click the "Resume" button.

- A confirmation message appears " Selected account has been resumed successfully "

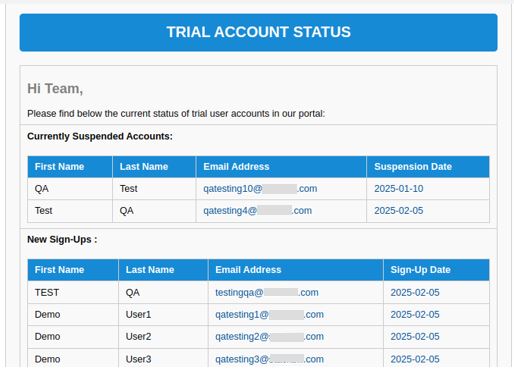
8. Trial Account Status Update Notifications:
- Admins will receive automatic email notifications whenever a trial account’s status changes (e.g., suspension, expiry, conversion to a live account).
Disabling Trial Manager
1. Navigation to Trial Manager Feature:
-
Login into the admin portal.
-
Navigate to the Config section by clicking on the Config icon in the portal menu.
-
Under My Organization section, click on the Trial Manager link.
2. Disable Trial Manager:
- Set the Trial Settings to "No".

-
Click the "Update" button to apply changes.
-
Once disabled, the Trial Accounts section will no longer be accessible from the user list page.
