Additional Service
Introduction
In the context of cloud service platforms, an Additional Service refers to any extra or supplementary service that is provided to the customer by the cloud service provider, which goes beyond the scope of the original order or contract. These services are not part of the standard package or initial agreement and are offered separately, usually for an additional fee.
Additional services could include a wide range of options that a customer may need as their usage of cloud resources grows, or their specific requirements change. These services are typically optional and provided based on customer demand. They could address anything from enhanced support services to specialized tools or features.
1. What is an Additional Service?
- An additional service is typically an extra feature or functionality that was not included in the original service agreement or order.
- These services are often requested later by the customer, or they might be offered by the provider to enhance the customer's cloud environment.
- The additional services could include advanced technical support, performance enhancements, security upgrades, custom integrations, or third-party applications.
2. Purpose of Additional Services:
-
Additional services serve to address growing customer needs or changing business requirements.
-
As businesses grow, they may require more advanced features, higher resource limits, or specialized services that weren’t part of the original package.
-
These services allow customers to expand their capabilities without needing to renegotiate their entire contract or switch to a different base service plan.
-
The admin portal offers two different categories. They are: Additional service & Monitoring .
Adding a Service using the Additional Services Category:
This process allows cloud administrators or service providers to introduce a new additional service to their product offerings through the "Additional Services" category. These additional services could be any supplementary services beyond the basic cloud offerings, such as enhanced support, monitoring, backup services, or third-party software integrations.
1. Navigate to the Additional Service Section:
-
Login into the admin portal.
-
From the Products section, go to Additional Service and then click on Add Service.
-
This will open a form where you can begin adding the new additional service.
2. Enter Service Details:
-
Enter the name and description:
-
In the provided fields, give the new additional service a name that clearly describes its functionality or purpose.
-
Write a detailed description to specify what this service entails, what problems it solves, and any key features it includes. This information will help potential customers understand the benefits of the service.
-
-
Select the category:
- Choose the appropriate category for this additional service. Categories help group similar services together for easy navigation.
-
Select the type:
- Determine the type of additional service from a predefined list of service types.
-
Select the domain:
- Choose the domain where this additional service will be available. A domain could represent a specific customer. You can either select a specific domain or you can select all domains.
-
Favicon image:
-
Upload a favicon image that visually represents the additional service. A favicon is typically a small icon that appears next to the service name in the user interface, helping to identify and brand the service. Ensure that the image meets the required size or resolution.
Once all the above details are filled in, click the Save button.
3. Redirect to the Cost Update Screen:
- After saving the new additional service, you will be automatically redirected to the cost update screen. This step is critical because it involves setting the pricing for the service.
4. Set Service Cost :
-
Select the zone:
- In the cost update screen, start by choosing the zone where the additional service will be available. You can either select a specific zone or apply the service to all zones.
-
Enter the service cost:
- Input the cost for the additional service.
- The service cost represents the amount customers will be charged when they select this service.
-
Once you’ve entered the pricing, click the Save button to save the service cost.

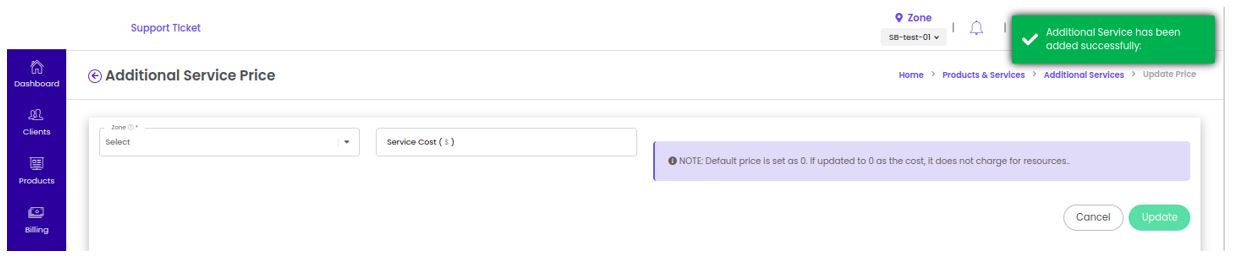
5. Confirmation:
-
After you click Save, a confirmation message will appear indicating that the additional service price has been successfully added.
-
This means that the additional service is now available for customers, and they will be able to view its pricing and select it based on their needs.
Adding a Service using the Monitoring Category:
When using the Monitoring category, you're adding a service designed to monitor various aspects of the cloud infrastructure, such as resource utilization, system performance, or application monitoring. Monitoring services are crucial for tracking system health, security, and optimizing resource usage.
1. Navigate to the Additional Service Section:
-
Login into the admin portal.
-
From the Products section, go to Additional Service and then click on Add Service.
-
This will open a form where you can begin adding the new monitoring service.
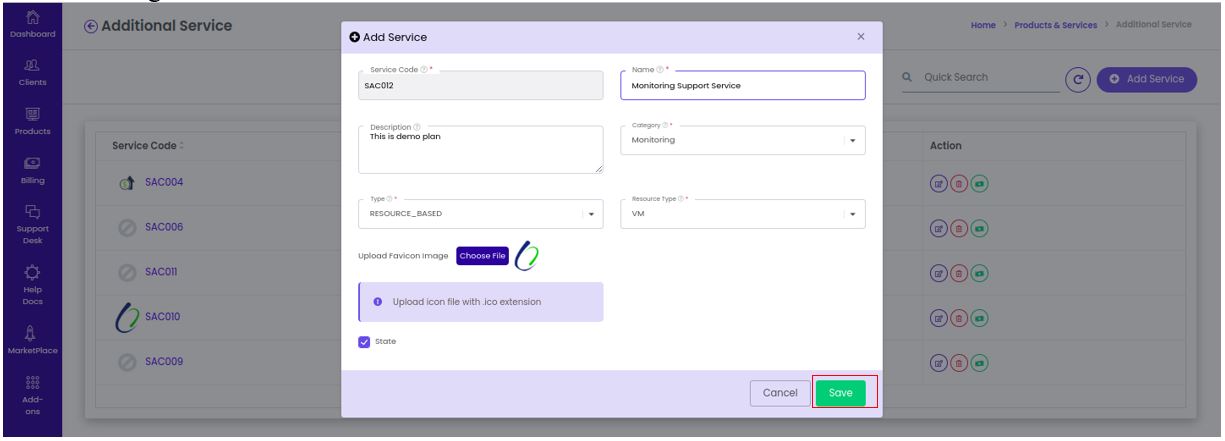
2. Enter Service Details:
-
Enter the name and description:
-
In the input fields, provide the name of the monitoring service. Choose a name that clearly communicates the purpose of the service, such as "CPU Usage Monitoring" or "Application Performance Monitoring".
-
In the description field, give a detailed explanation of what this monitoring service does. Specify what the service will track, how it will help customers, and any particular features or insights it provides.
-
-
Select the category:
- Choose Monitoring from the list of available categories. This groups the service under monitoring tools and ensures customers can easily find it when looking for monitoring options.
-
Select the type:
- Choose the appropriate service type from the predefined list.
-
Select the resource type:
- Specify the resource type that the service will monitor. This could refer to the type of cloud resource being tracked, such as compute instances, storage volumes, or network resources.
-
Upload the favicon:
- Upload a small favicon image representing the monitoring service. The favicon is typically a small, recognizable icon that will be displayed next to the service in the user interface, helping users quickly identify it.
-
Once you’ve entered all the necessary details and uploaded the favicon, click Save to proceed.
3. Redirect to the Cost Update Screen:
- After saving the service, you will be automatically redirected to the cost update screen. This is where you will set the pricing for the monitoring service.
4. Set Service Cost:
-
Select the zone:
- Choose the zone where the service will be made available. You can either apply the service to a specific zone or select All Zones.
-
Enter the service cost:
-
Input the cost of the monitoring service.
-
Once you’ve entered the pricing details, click the Update button to save the service cost.
-

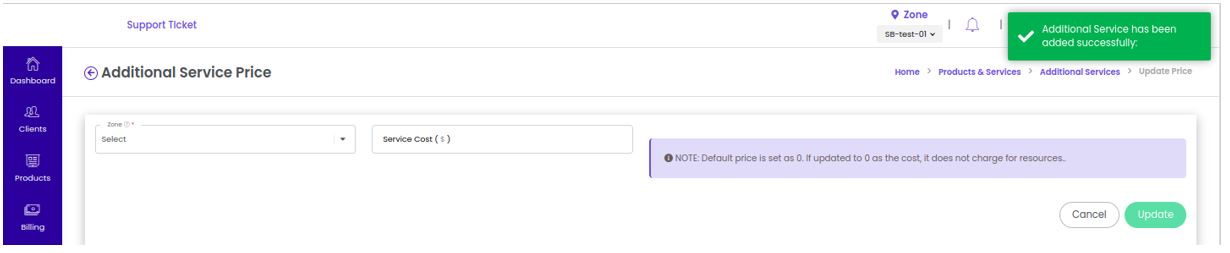
5. Confirmation :
- After clicking Update, you will receive a confirmation message indicating that the additional service price has been successfully added.

- The monitoring service is now live and available for customers to select, complete with the correct pricing.
Additional Service Features
Editing an Additional Service :
The edit action allows administrators to update key details of an additional service that has already been created, such as modifying the description or updating the favicon image.
1. Navigate to the Additional Service Section:
-
Login into admin portal.
-
Go to the Products section in the admin portal.
-
Then, select Additional Service from the list.
-
This section lists all the additional services that have been created.
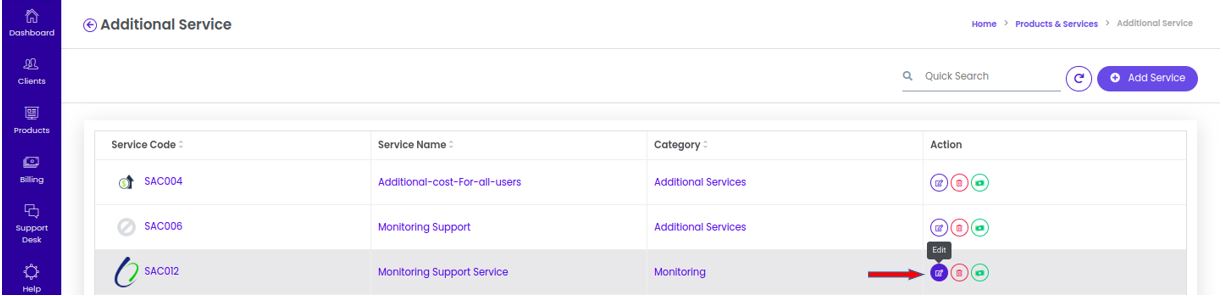
2. Select the Service to Edit:
-
From the Additional Service list, locate the specific service you want to update.
-
Once you have identified the service, select the Edit action option. This will open up the edit page where you can make changes to the service details.
3. Save the Changes:
- After making the necessary changes, click the Update button to save your edits.

4. Confirmation of Update:
- Once the update process is complete, you will receive a confirmation message indicating that the selected service has been updated successfully.

- The changes to the service, whether it's the new description or the new favicon image, will now be visible to users and take effect immediately.
Deleting an Additional Service :
The delete action allows administrators to remove an additional service that is no longer needed or relevant.
1. Navigate to the Additional Service Section:
-
Login into admin portal.
-
Go to the Products section in the admin portal.
-
Then, select Additional Service from the list.
-
This section lists all the additional services that have been created.
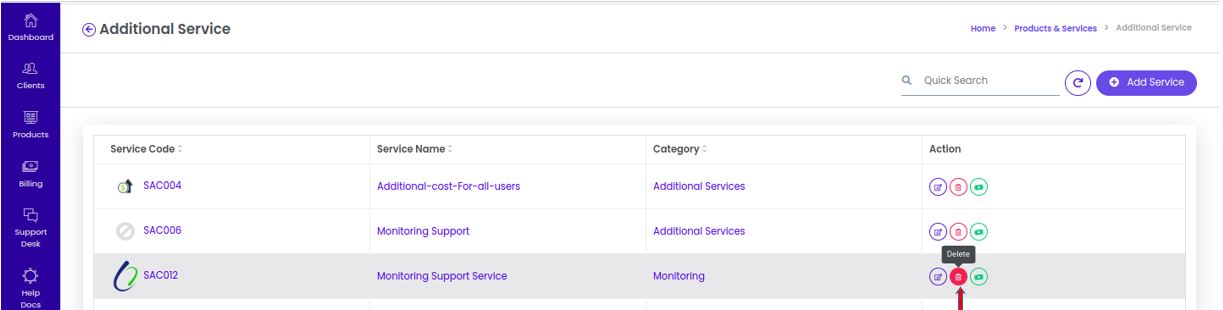
2. Initiate the Deletion:
-
Once you have identified the service you want to delete, locate the Delete action icon (represented by a trash bin )
-
Click on the delete icon to initiate the deletion process.
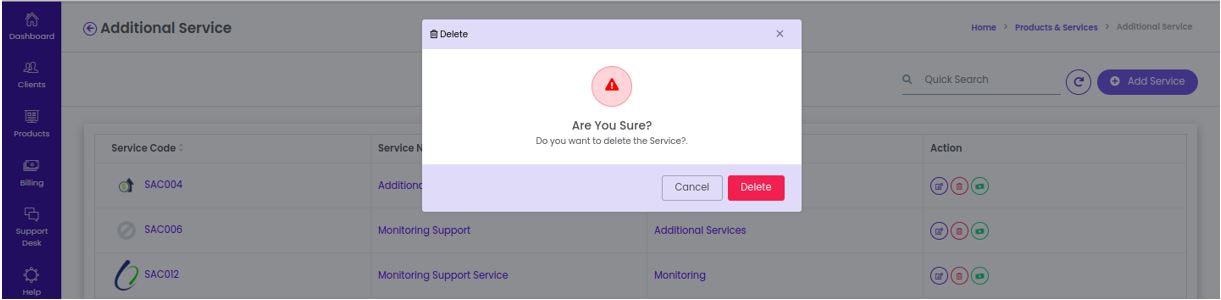
3. Confirm the Deletion:
-
After selecting the delete icon, a confirmation prompt will appear. This step is crucial to prevent accidental deletions.
-
You’ll be asked to confirm whether you want to permanently remove the service from the system.
-
Make sure that you truly want to delete the service, as this action may be irreversible depending on system policies.
-
To proceed with the deletion, click the Delete button in the confirmation dialog.
4. Service Deleted Successfully:
-
After confirming the deletion, the system will remove the selected additional service from the portal.
-
You will receive a notification or success message indicating that the selected service has been deleted successfully.

Update price for an Additional Service :
The Update Price feature allows administrators to modify the cost of an existing service and ensure that the new pricing is reflected in upcoming invoices.
1. Navigate to the Additional Service Section:
-
Login into admin portal.
-
Go to the Products section in the admin portal.
-
Then, select Additional Service from the list.
-
This section lists all the additional services that have been created.
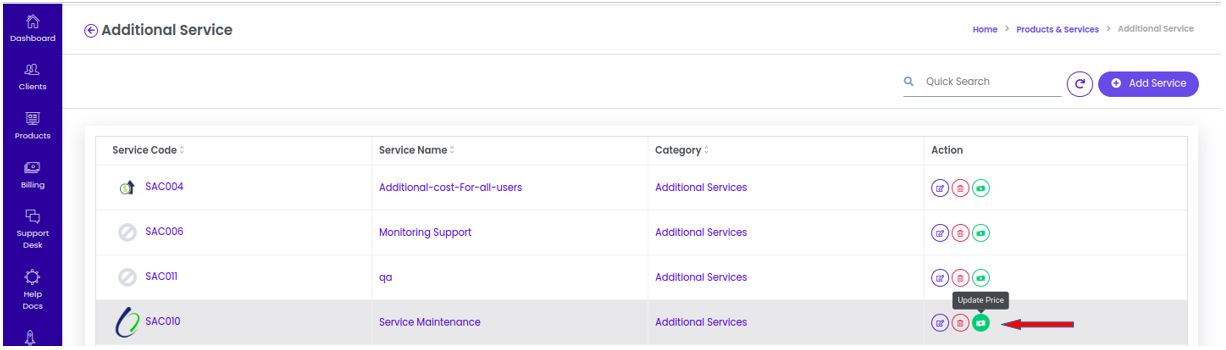
2. Initiate the Price Update Process:
-
Once you have identified the service, find and click on the Update Price action icon next to the selected service.
-
This action will redirect you to the service price screen, where you can modify the pricing details.
3. Enter the New Service Cost:
-
On the service price screen, you will be prompted to enter the new service cost.
-
Ensure that you carefully enter the correct new pricing value, considering any changes in your cost structure, customer agreements, or market conditions.
-
Once you’ve entered the new price, click the Update button to apply the changes.

4. Successful Price Update:
- After clicking the Update button, the system will save the new price, and a confirmation message will appear indicating that the updated price has been added successfully.

5. Price Change History Table:
- After successfully updating the price, the new price will automatically be reflected in the Price Change History table.
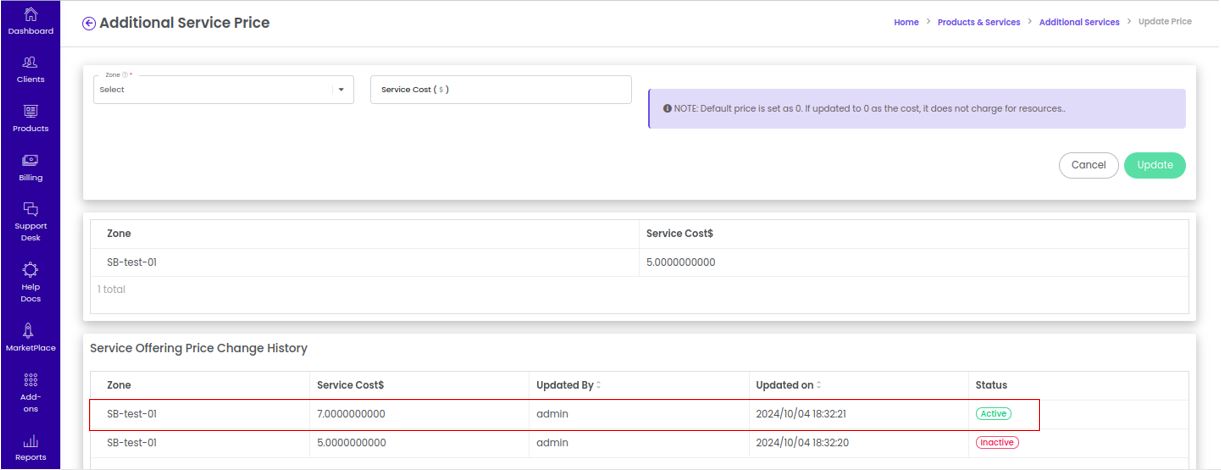
- This table provides a record of all previous pricing changes for the service, which can be useful for tracking and auditing purposes.