Network Offerings
Introduction
Here’s an expanded explanation of the concept of Network Offerings and how it caters to the needs of cloud infrastructure users:
Network Offerings:
In the cloud infrastructure environment, network offerings refer to the various services, features, and configurations that define how networking is set up and managed within a cloud service provider's platform. These offerings are critical for ensuring connectivity, security, and performance for virtual machines (VMs), applications, and other cloud resources.
Catering to Different Needs and Preferences:
Cloud users and organizations have diverse needs when it comes to networking. Here’s how network offerings help meet those needs:
1. Customization:
-
Different users require different levels of control and customization over their network infrastructure. Some may prefer pre-configured network setups for simplicity, while others may require more advanced features like custom VLANs, static IPs, or dedicated networks.
-
For example, users can configure different types of networks such as isolated networks (for security), shared networks (for flexibility), or VPCs (Virtual Private Clouds) to mimic private, on-premise-like environments in the cloud.
2. Security :
- Network offerings often come with built-in security features, such as firewall rules, network isolation, VPN support, and security groups, that allow users to ensure their data and services are protected from external threats.
3. Security:
- Network offerings often come with built-in security features, such as firewall rules, network isolation, VPN support, and security groups, that allow users to ensure their data and services are protected from external threats.
4. Performance and Scalability:
- Some cloud users require high-performance networking for applications with heavy traffic or low-latency needs (such as gaming, real-time video streaming, or financial trading applications).
5. Different Types of Networking Services :
-
Depending on the use case, cloud providers may offer different types of networking services under their network offerings, such as:
- Public Network: Provides public internet access for resources, suitable for publicly accessible services.
- Private Network: Ensures that resources are isolated from the public internet, providing a secure, private environment for internal workloads.
- Virtual Private Cloud (VPC): Allows users to create a private network within the cloud, with full control over IP address ranges, subnets, and routing tables.
- VPNs: Allow secure connectivity between the cloud and on-premise infrastructure.
Shared Network Offering:
A shared network allows multiple instances (virtual machines or resources) belonging to different accounts or users to coexist on the same network. Unlike isolated networks (where each user or instance is placed in a separate virtual network), a shared network is accessible to all instances across different accounts, allowing them to communicate within the same network infrastructure.
Accessing Shared Network Offering in admin Portal:
1. Navigate to the Network Offerings Section:
- From the admin portal, go to the Products section. This section is where you manage various product offerings like compute, storage, and network.
2. Go to Network Offerings:
- Within the Products section, locate and select Network Offerings. This is where you will be able to manage different types of network configurations available to your users.
3. Select Shared Type Network:
- Once in the Network Offerings section, you can select the network type that you want to use for your virtual resources.

- The Shared section will ensure that the network being created can be accessed by instances from multiple accounts, and users within that network will share the same underlying infrastructure.
Isolated Network Offering:
An isolated network is a virtual network that is specifically dedicated to instances (virtual machines or resources) belonging to a single account. Unlike shared networks, where multiple users can access and share the same network infrastructure, an isolated network is only accessible by instances created under the same account. This provides a higher level of security, privacy, and control.
This kind of network is typically used when an organization or user requires their resources to be fully segregated from those of other users, whether for compliance reasons, security concerns, or simply for better management of network traffic.
1. Navigate to the Network Offerings Section :
- From the Stackbill admin portal, start by navigating to the Products section. This is the area where you manage different types of offerings, such as compute, storage, and network.
2. Go to Network Offerings :
- Within the Products section, locate and select Network Offerings. This section contains the various network configurations that can be created and applied to instances within the cloud environment.
3. Select Isolated Type Network :
- In the Network Offerings section, you will see different types of network options available. choose the Isolated tab.

- This will ensure that the network being created is only accessible by the instances of a single account, offering complete isolation and privacy for that account.
L2 Network Offering :
L2 (Layer 2) networks in cloud infrastructure provide a type of network isolation without any advanced networking services. These networks operate at Layer 2 of the OSI model, meaning they work at the data link layer, primarily concerned with direct communication between devices on the same network (i.e., within the same subnet or broadcast domain). In simpler terms, L2 networks handle basic connectivity without the routing, firewall, or load-balancing features commonly found in more complex network configurations.
Steps to access L2 Network Offerings in the admin Portal:
1. Navigate to the Network Offerings Section :
-
Log in to the portal, and from the Products section, locate and select Network Offerings.
-
This section allows you to manage, and configure different types of networks, including L2, isolated, and shared networks.
2. Select the L2 Type Network Offering :
- Once in the Network Offerings section, you'll be presented with various network types. To configure a Layer 2 (L2) network, select the **L2 ** tab .

- This will ensure that the network being created functions purely at the Layer 2 level, without the addition of routing or other Layer 3 (network layer) services.
Network Offering Actions
Add/Update action:
- You can use the add option under the action menu to update the description of the network offering.


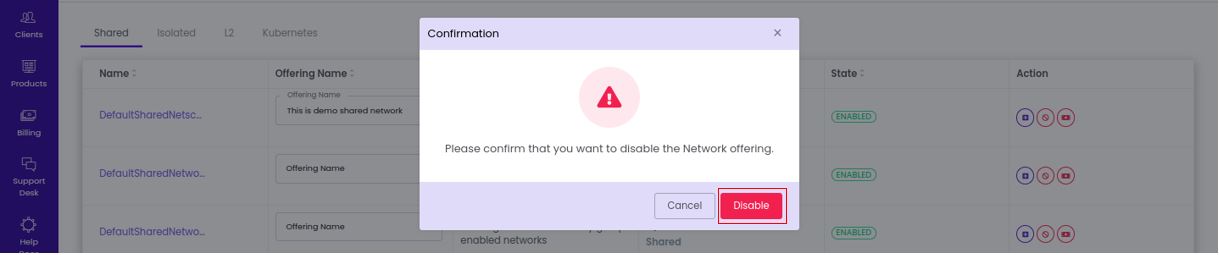
Enable/Disable Network Offering:
-
This option allows you to activate or deactivate a specific network offering within the portal.
-
Once you’ve selected the network offering, you can confirm your action by clicking the "Enable" or "Disable" button.

-
If you choose to disable the offering, it will no longer be available for selection when creating new instances or services that rely on that network.
-
Similarly, enabling it makes it available for use again.
-
After confirming your action, a message will appear indicating that the network offering has been successfully enabled or disabled.

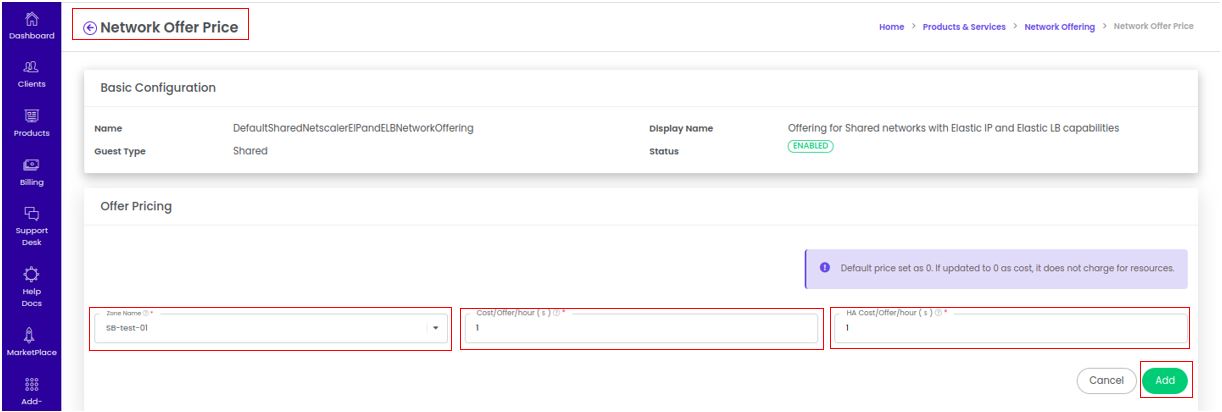
Network Offer Pricing Configuration
1. Accessing the Cost Action Button:
-
In the Network Offering section, you can configure the cost associated with a specific network offering.
-
To begin, click on the Cost Action Button, which will take you to the Network Offer Price page.

2. Zone Selection:
- On this page, you'll first be asked to select the Zone Name. This determines the geographical or logical zone to which the cost will apply.
3. Entering Cost Values :
-
You can then enter the Network Cost, which represents the base price for using this particular network offering.
-
If applicable, you can also enter the HA (High Availability) Cost. This is an additional charge for ensuring high availability of network services.
4. Adding the Cost :
- After entering the necessary values, click the Add button to finalize and apply these costs to the network offering.
5. Confirmation :
- Once the cost values have been successfully added, you'll receive a confirmation message indicating that the network offering cost has been added successfully.
