Support Desk Features
Overview
Enabling the Support Desk within the admin panel allows administrators to set up and configure a comprehensive customer support system. This feature is typically available as an add-on or a module that can be enabled from the admin area, granting customers access to technical support, FAQ sections, and ticketing systems for issue resolution.
Steps to Enable Support Desk
1. Navigate to Add-ons Section :
-
Login into the admin portal.
-
From the admin panel, go to Add-ons > Support Tickets.
-
This is where administrators can enable the support desk feature for their users.
2. Enable the Support Desk Add-on :
- Click the "Enable" button to activate the support desk.
Note: Once the support desk is enabled, the settings will take effect for users upon their next login, or they can manually refresh their page to immediately see the changes.

3. Navigate to Support Desk Configuration :
- Once the support desk is enabled, administrators can configure various support-related settings and features by navigating to the Support Desk menu. This is where the core components of the support system can be set up and managed.
Support FAQ Category :
1. Creating FAQ category :
The FAQ Category is a feature within the support desk that helps organize frequently asked questions (FAQs) into groups or topics for easier navigation and management. By grouping FAQs into categories, users can find the information they need more efficiently.
1. Navigate to the FAQ Category Section :
-
Login into the admin portal.
-
From the Support Desk menu in the admin panel, navigate in the order: Support Desk > FAQ Category > Add.
-
This will open the section where you can create a new FAQ category.
2. Add a New FAQ Category :
-
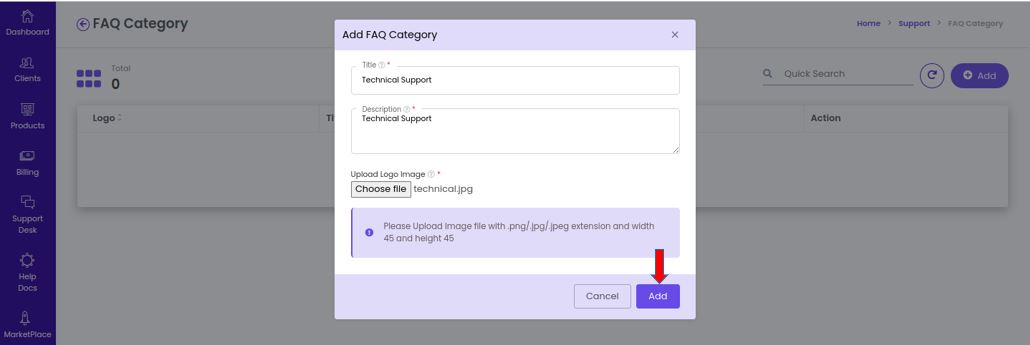
Click on the Add FAQ Category button to initiate the creation process.
-
This allows you to define the new category by filling in the necessary details.
3. Enter the Title & Description :
-
Title: Provide a clear and descriptive title for the FAQ category.
-
Description: Provide a brief description that explains the purpose or focus of the FAQ category.
4. Upload a Logo Image :
-
You can optionally upload a logo image to visually represent the FAQ category.
-
Ensure the image you upload adheres to the size restrictions or requirements (such as format or file size).
-
The logo helps in visually distinguishing the category, especially in user-facing interfaces.
5. Click the Add Button :
- Once you have entered all the details (title, description, and logo), click the Add button to save and create the new FAQ category.
6. Confirmation :
- After clicking the Add button, a confirmation message will appear indicating that the FAQ Category has been created successfully.

- The new category will now appear in the list of FAQ categories, and you can start adding specific FAQs under this category.
Support FAQ :
The FAQ section within the support desk allows administrators to add specific questions and answers that customers frequently ask. This helps in providing a self-service option to users by answering common queries without them needing to contact customer support directly.
1. Navigate to the FAQ Section :
-
Login into the admin portal.
-
From the Support Desk menu in the admin panel, navigate in the order: Support Desk > FAQ > Add.
-
This will open the section where you can create a new FAQ entry.
2. Add a New FAQ :
-
Click on the **Add ** button to initiate the process of adding a new frequently asked question.
-
This will open a form where you can enter all the relevant details for the FAQ.
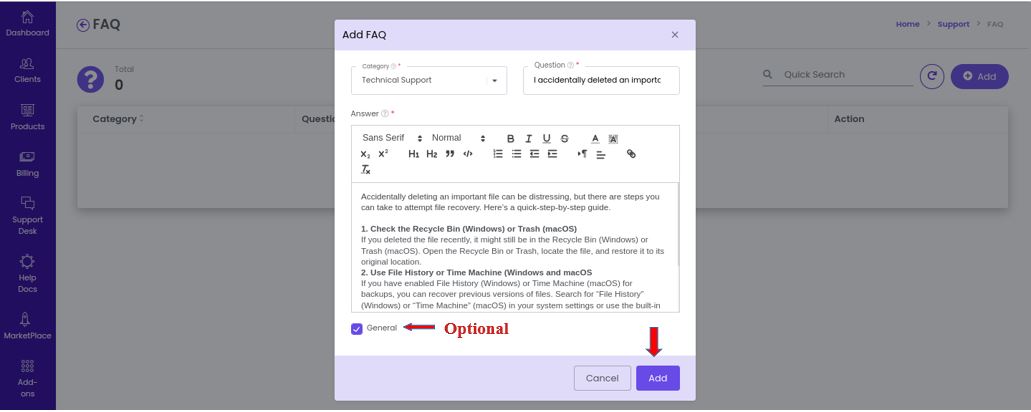
3. Select the Category :
-
Choose the appropriate FAQ category from the dropdown menu.
-
Categories help to group related questions for better organization and user experience. For example, if the FAQ is about billing, you might select a "Billing Issues" category.
-
The category selection ensures that the FAQ appears under the relevant section in the user-facing support portal.
4. Enter the Question :
-
In the question field, enter the specific query or concern that customers often have.
-
Ensure the question is clear, concise, and reflective of what customers might typically ask. For example, "How can I reset my password?" or "How do I upgrade my plan?"
5. Enter the Answer :
-
In the answer field, provide a comprehensive but straightforward response to the question.
-
Make sure the answer resolves the question clearly, using step-by-step instructions or detailed explanations where necessary.
6. Optional: Mark as General :
- There is an optional field called "General," which, when selected, ensures that the FAQ will be visible in the user portal's FAQ quick list.
7. Click the Add Button :
- After entering the question, answer, and selecting the relevant category, click the Add button to save the new FAQ.
8. Confirmation :
- Once you click Add, a confirmation message will appear indicating that the FAQ has been successfully created and added to the system.

Department
The Department section in the Support Desk allows administrators to organize and manage different categories of support requests by assigning them to specific departments. This helps route customer queries to the appropriate teams (e.g., Billing, Technical Support, Sales), improving response efficiency and ensuring that the right staff handles the right issues.
1. Navigate to the Department Section :
-
Login into the admin portal.
-
From the Support Desk in the admin panel, follow the navigation: Support Desk > Department > Add.
-
This takes you to the section where you can create and configure a new department.
2. Click the Add Department Button :
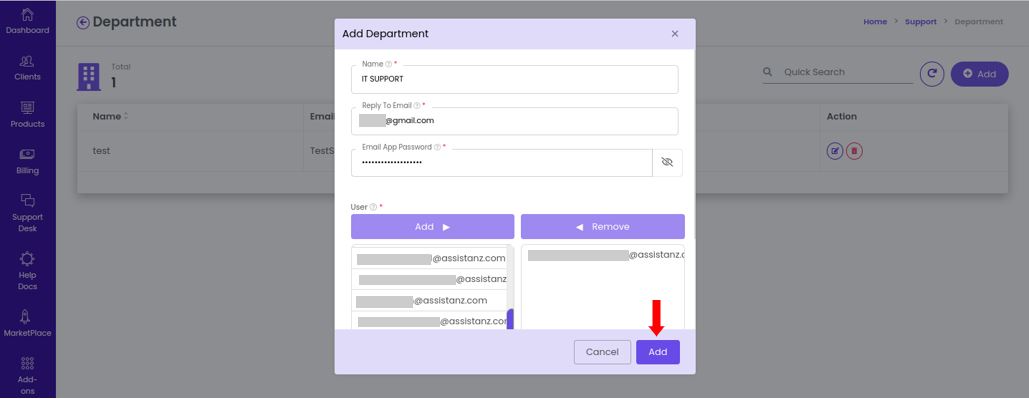
- Click the Add Department button to open the form for entering the department details.
3. Enter the Department Name :
- In the Department Name field, specify the name of the department.
4. Enter the Reply-To Email :
-
The Reply-To Email is the email address from which customers will receive responses from this department.
-
Ensure this email is relevant to the department so customers know which team is replying. For example:
- [email protected] for Billing-related inquiries
- [email protected] for Technical Support
-
All email communication to and from this department will use this email address.
5. Enter the Email App Password :
-
This is the password for the email account that will be used for sending and receiving support emails.
-
Ensure the password is securely stored and corresponds to the email address entered in the Reply-To Email field.
6. Select Users (Department Members):
-
You will be prompted to assign users to this department.
-
Select the appropriate users who will be responsible for managing and responding to tickets for this department.
7. Click the Add Button :
- Once all the information is entered (Department Name, Reply-To Email, Password, and assigned Users), click the Add button to save the department.
8. Confirmation :
- After clicking the Add button, you will receive a confirmation message indicating that the department has been created successfully.

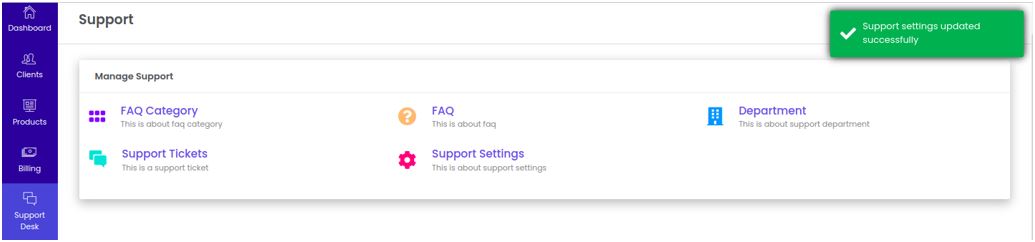
Support Settings
The Support Settings section within the Support Desk configuration allows administrators to customize various aspects of how support tickets are managed, including auto-closing of tickets, ticket numbering, and ticket sequence. These settings help streamline support operations and ensure consistency in how tickets are handled.
1. Navigate to the Support Settings:
-
Login into the admin portal.
-
From the admin panel, follow the navigation path:
Support Desk > Support Settings -
This will take you to the interface where you can modify the support ticket settings.
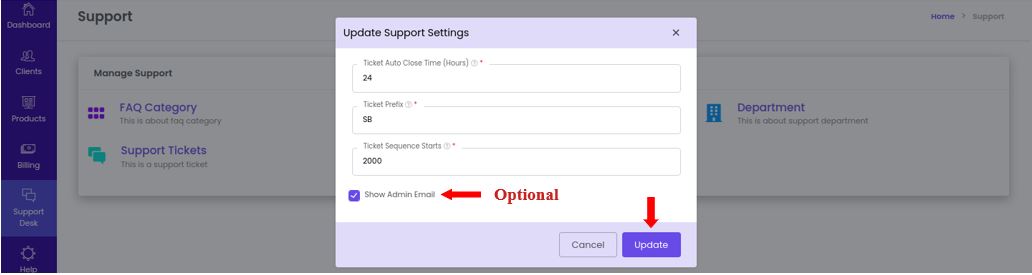
2. Enter Ticket Auto Close Time (Hours):
-
In this field, the administrator can define how long a ticket will remain open before it is automatically closed if there is no activity or response.
- Example: If you enter 48 hours, any ticket that has not been updated or responded to within that time frame will be automatically closed.
-
This helps in managing the ticket queue efficiently by removing inactive tickets, ensuring that the support team focuses on current issues.
3. Enter Ticket Prefix :
-
The Ticket Prefix is a customizable string or word that will be added to the beginning of each ticket number.
- Example: If you set the prefix as "SUP", the first ticket will be labeled as "SUP-001", the next as "SUP-002", and so on.
-
This prefix helps in easily identifying the nature of the ticket and adds a layer of organization, especially in systems where multiple types of requests might exist.
4. Enter Ticket Sequence Starts :
-
In this field, the administrator defines the starting number for the ticket sequence.
- Example: If you set this value to 1000, your first ticket will be labeled "SUP-1000", followed by "SUP-1001", and so forth.
-
This allows for flexibility in ticket management and helps maintain continuity, especially if there is a historical context or if you want to start numbering tickets from a specific point.
5. Optional: Show Admin Email :
- This option allows the administrator to decide whether to display the admin's email address in the support tickets or communications.
- If enabled, the email address will be visible to customers, allowing them to reach out directly for support or inquiries.
6. Confirmation :
- By clicking the Update button, you will receive a confirmation message indicating that the support settings has been updated successfully.
Support Tickets
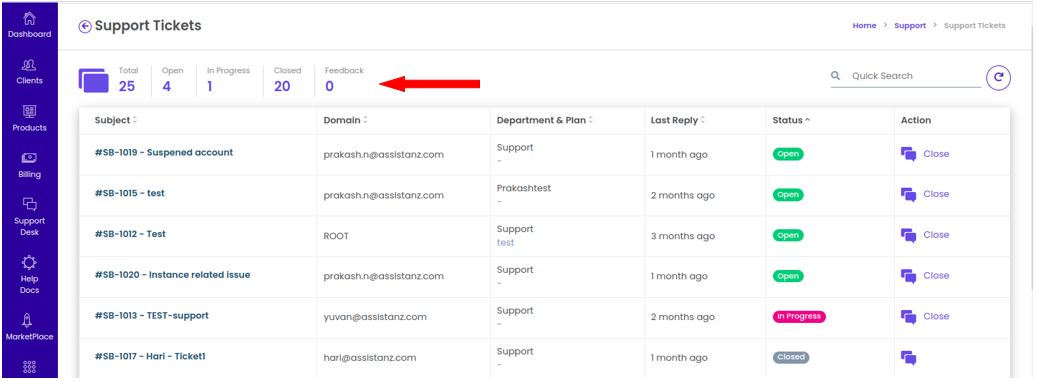
The Support Tickets system is an essential feature of a customer support platform that allows users to report issues, seek help, and track the resolution process. The Support Tickets Dashboard provides a comprehensive view of all support tickets, helping administrators manage customer inquiries effectively.
Components of the Support Tickets Dashboard:
-
Total:
- This metric indicates the overall number of support tickets that have been raised within the portal. It gives administrators a quick snapshot of the support volume they are handling.
-
Open:
- Tickets in the Open state are newly created tickets that have not yet been addressed. This is the initial status of all support tickets and indicates that the customer is waiting for assistance.
-
In Progress:
- When an admin starts working on a ticket, they can change its status to In Progress. This signifies that the support team is actively addressing the customer's issue, and it is currently under resolution.
-
Answered:
- Once the admin has resolved the issue and provided a response to the customer, the ticket status can be updated to Answered. This indicates that the ticket has been addressed, and the customer can review the response.
-
Customer Reply:
- If the customer responds to the admin's resolution or provides additional information, the ticket status changes to Customer Reply. This shows that the communication is ongoing, and further interaction may be required.
-
Closed:
- Tickets can be marked as Closed either automatically based on support settings (such as the auto-close time defined in the support settings) or manually by the admin. A closed ticket indicates that the issue has been resolved satisfactorily, and no further action is needed.
-
Feedback:
- After a ticket is resolved, the admin has the option to send feedback requests to the customer regarding their experience with the support process. This feedback can help the organization improve its service quality.
Additional Details for Each Ticket:
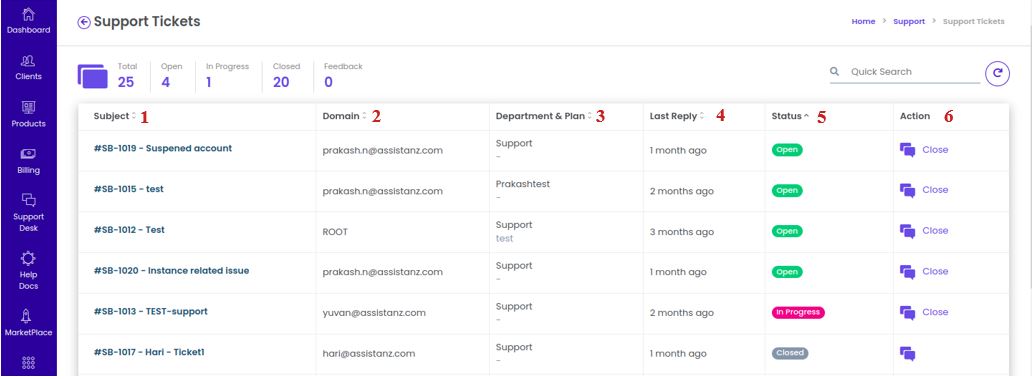
1. Subject of the Support Tickets:
- This is a brief description of the issue or request raised by the customer. It helps the support team quickly understand the context of the ticket.
2. Owner of the Support Ticket:
- The owner is the specific admin or support agent assigned to handle the ticket. This designation helps in tracking who is responsible for the resolution.
3. Department of the Support Ticket :
- This indicates the specific department or team within the organization that is best suited to handle the ticket. For example, it could be Technical Support, Billing, Sales, etc.
4. Last Reply of the Support Ticket :
- This field shows the most recent response made regarding the ticket, providing visibility into the current state of the conversation and the latest information shared.
5. Status of the Support Ticket :
- The overall current status of the ticket (Open, In Progress, Answered, Customer Reply, Closed) provides a quick reference for the support team to prioritize their workload.
6. Admin Can Close the Ticket Through Manually :
- Admins have the ability to manually change the status of a ticket to Closed when they believe the issue has been resolved. This manual action allows for flexibility in the support process, ensuring that tickets are only closed when appropriate.
Support Ticket from user panel :
To open an new ticket from the user panel, follow the below steps :
-
Login into the user portal.
-
Once logged in, look for the main navigation menu.
-
Click on the "Support" option.
-
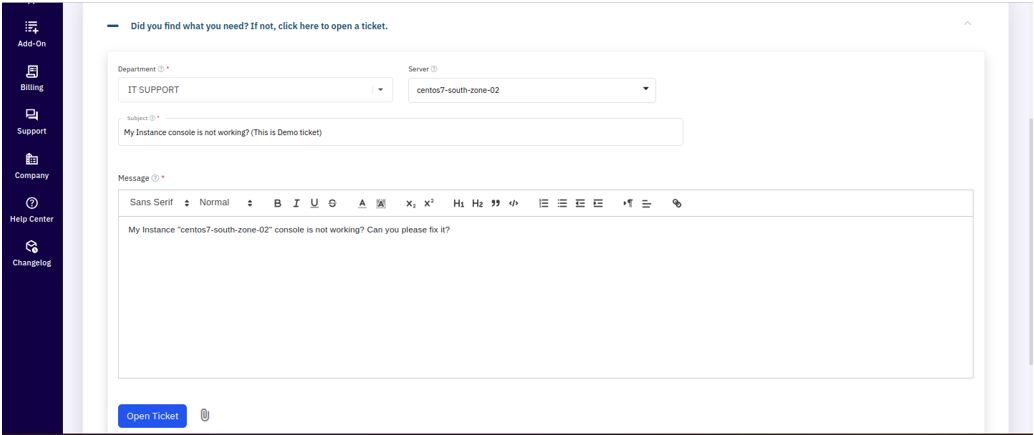
To open new ticket, user starts by locating and clicking the "Open Ticket" button within the user portal. This button is typically prominently displayed, allowing users to easily access the support ticket creation form.

-
After clicking the "Open Ticket" button, the user is prompted to select the department related to their issue. Departments might include technical support, billing, customer service, etc.
-
The user may be presented with an option to select the server associated with their issue. This step is optional, indicating that it is not mandatory to fill this field.
-
The user is required to enter the subject of the ticket, which is a brief summary of the issue or request.
-
Following that, the user should provide a more detailed message describing the problem, question, or request. This information is crucial for the support team to understand the nature of the inquiry and provide effective assistance.
-
There is an optional field for the user to upload or attach files related to their issue, such as screenshots, logs, or documents.
-
Once all the necessary information has been entered, the user clicks the "Open Ticket" button to submit their request.
- After clicking the button, the system processes the request and confirms that a new support ticket has been created successfully.
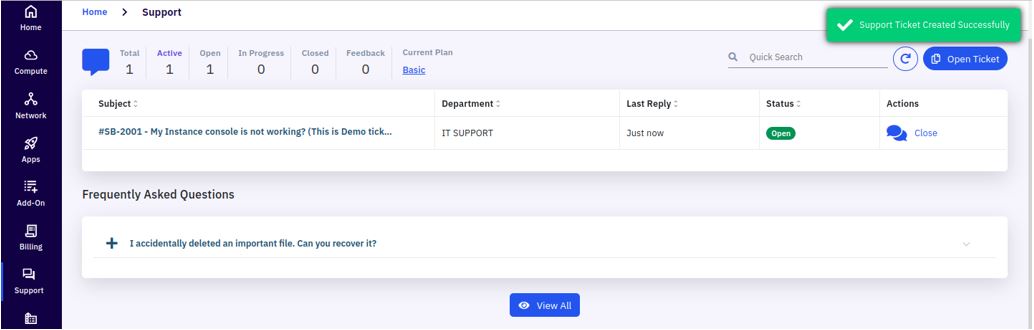
-
The user may receive a confirmation message, ticket number, or email notification, providing them with reference details for future communication regarding their ticket.
-
Also, admin can able to see the user ticket under support tickets section.
