Shared File Service (SFS)
This guide provides step-by-step instructions for StackBill administrators to configure and enable the Shared File Service (SFS) feature in the Cloud Management Portal.
SFS offers a fully managed NFS-based shared storage solution for end users. Before this service becomes accessible through the user portal, StackBill administrators must perform a three-step configuration process.
Configuration Workflow Summary
To enable the SFS feature in the cloud environment, follow the three essential steps:
-
Create a Compute Offering for SFS
-
Create a Storage Offering for SFS
-
Enable the SFS Service
Each of these steps is detailed in the sections below.
Create SFS Compute Offering
-
Log in to the StackBill Admin Portal using admin credentials.
-
Navigate to Products → click on Compute/Instance Offering.

- On the offerings list page, click “Create Offering”.

- In the Creation Type, select SFS Compute Offering

-
Under Basic Configuration:
Select the availability zones where this SFS offering will be provisioned.

-
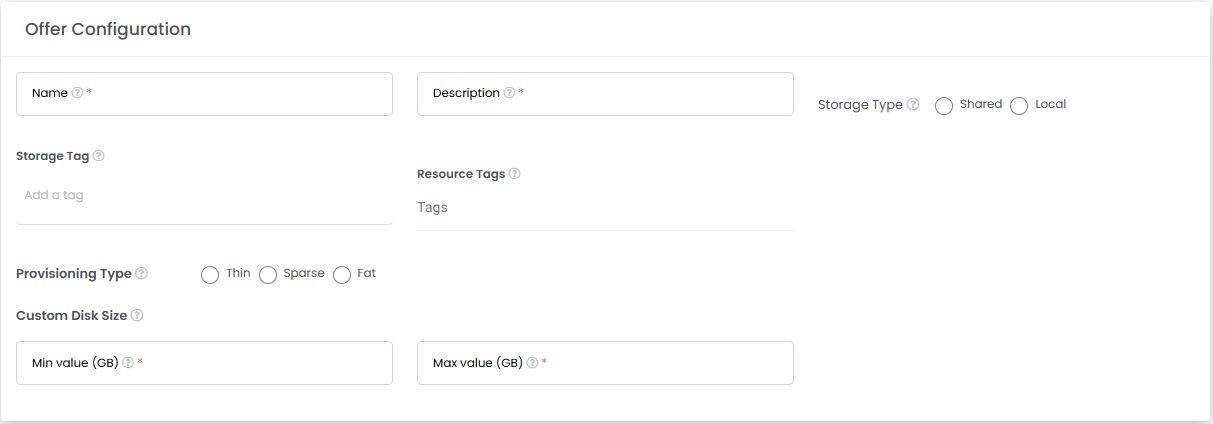
In the Offer Configuration section:
-
Enter a Name and Description.
-
Choose Storage Type as Shared
-
-
Provide the following resource specifications:
-
CPU Speed
-
Number of vCPUs
-
Default Root Disk Size
-
Default Memory Size
-

-
Under the Pricing Configuration:
-
For each zone, specify:
-
Setup Cost
-
Running VM (Total vCPU) Cost
-
Stopped VM (Total vCPU) Cost
-
Running VM (Memory) Cost
-
Stopped VM (Memory) Cost
-
-
-
Click Add to apply pricing for each selected zone.
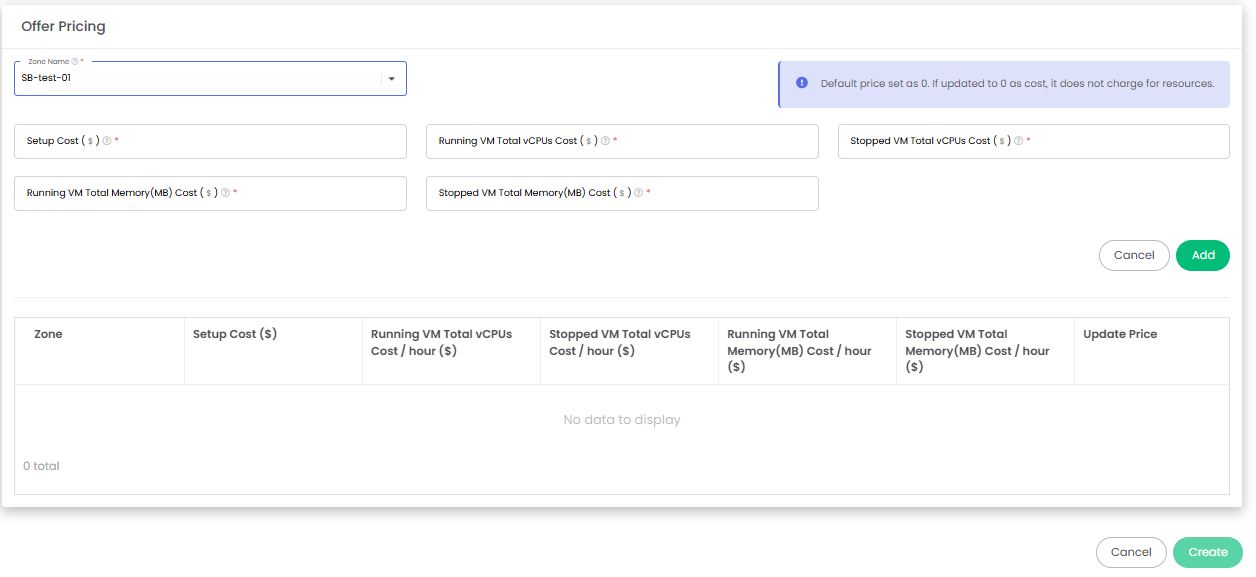
- Review all inputs and click “Create” to finalize the offering.
Create SFS Storage Offering
- From the Admin Portal dashboard, go to Products → click on Storage Offerings.
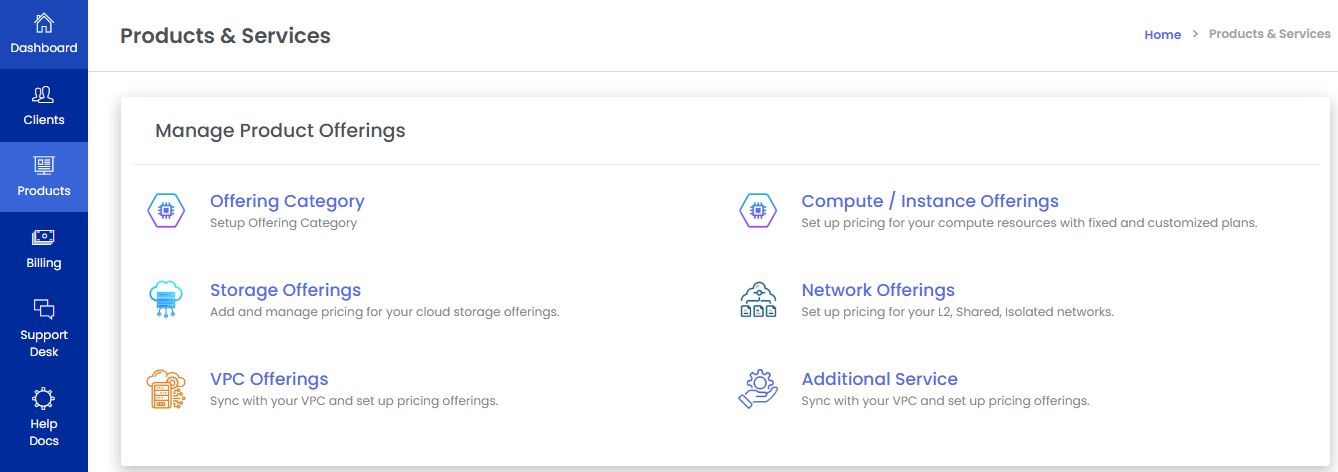
- On the offerings list page, click “Create Offering”.

- In the Creation Type, select SFS Storage Offering

-
In the Basic Configuration:
- Select the zones where the SFS storage service will be available.

-
In the Offer Configuration:
-
Provide a Name and Description for the offering.
-
Choose the Storage Type as shared
-
-
Specify the following values:
-
Minimum Disk Size
-
Maximum Disk Size
-
-
Under Pricing Configuration:
-
Define the Cost Per GB.
-
Click Add to apply pricing.
-
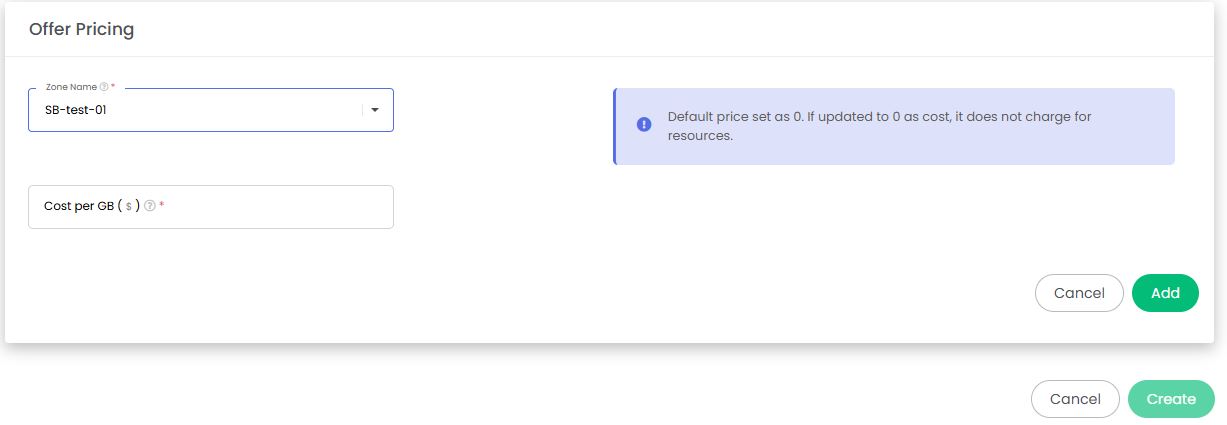
- After verifying all configurations, click “Create” to complete the storage offering setup.
Enable SFS Service
-
In the admin portal, navigate to the Add-on section from the left-side menu.
-
Locate the SFS Service in the Add-ons list.
-
Click the “Configure” button next to it.
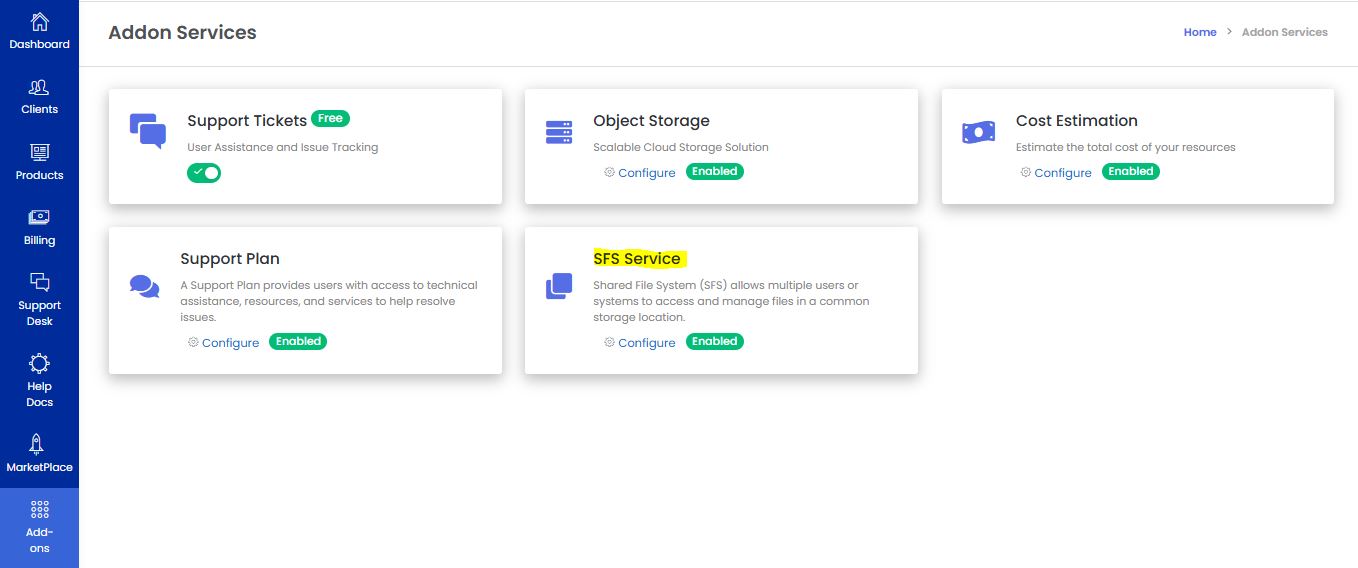
-
Under the Enable SFS Service section:
- Select Yes
-
Click “Update” to activate the feature.

-
Once enabled, the compute and storage offerings you created will now be visible under this section.
-
The SFS service is now fully configured and ready for users to consume from the user portal.