Promocode
Introduction
In the admin portal, Promocodes are used to offer discounts and incentives to both new and existing customers. These promo codes can be applied during the signup process or at various stages of the billing cycle, depending on their type and configuration.
There are two sorts of promotional code types available. They are sign-up and existing users.
Signup users
Benefits of Promocodes for Signup Users:
-
Incentive for New Users: Offering a discount at signup is a proven way to attract new customers and encourage them to create an account.
-
Marketing Strategy: Promocodes can be tied to specific marketing campaigns, helping to drive traffic to the platform through social media, email marketing, or other promotional channels.
-
Customizable and Flexible: Admins can easily customize promo codes for various target audiences and promotional goals. For instance, you might offer higher discounts during holiday seasons or special events.
-
Trackable Performance: By using different promo codes for different campaigns, you can track which marketing efforts are bringing in the most new users.
Add Promocode using SIGN_UP USER type:
1. Navigate to the Promocode Section :
-
Login into the admin portal.
-
Then navigate to Billing > Promocode.
-
Once on the Promocode page, you will see the list of existing promo codes and the option to add a new one.
2. Add a New Promocode :
- Click the Add button to create a new promo code.
3. Generate a Promocode :
-
A default promo code number will be generated automatically by the system. This is a unique alphanumeric code that users will use during signup to receive their discount.
-
If necessary, you have the option to edit the Promocode name. This allows you to create a more user-friendly or specific promo code that is easy to remember (e.g., WELCOME20 or NEWUSER50).
4. Select the Promo Code Type :
-
In the Type field, select SIGNUP. This specifies that the promo code is intended for new users during the signup process.
-
Promo codes of the SIGNUP type can only be used by customers when they create a new account, offering them a discount on their initial billing or subscription.
5. Enter the Discount Amount :
- Enter the discount Amount. This will be a fixed value (e.g., 50).
6. Set the Start and End Dates:
-
Select the Start Date and End Date for the promo code.
-
The Start Date determines when the promo code will become active, and the End Date determines when it will expire. Ensure that these dates align with your promotional campaign timeline.
7. Add the Promo Code Display Text :
-
Enter the Promo code display text. This text will appear on the signup screen of the user portal, informing new users about the available discount.
-
The display text can include details such as the discount amount and the eligibility criteria, e.g., _"Use promo code WELCOME50 to get $50 off on your first purchase!"
8. Save and Confirm :
- After entering all the necessary information, click add.
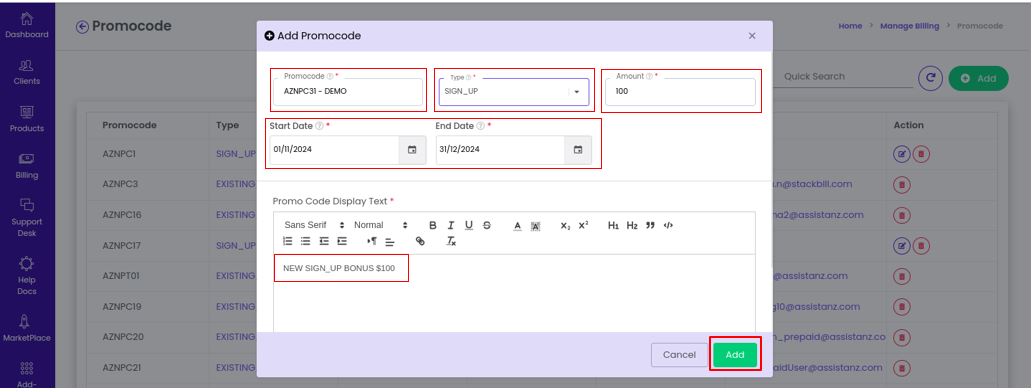
- The new signup-type promo code will now be successfully added to the system, and it will be available for new users during the signup process.
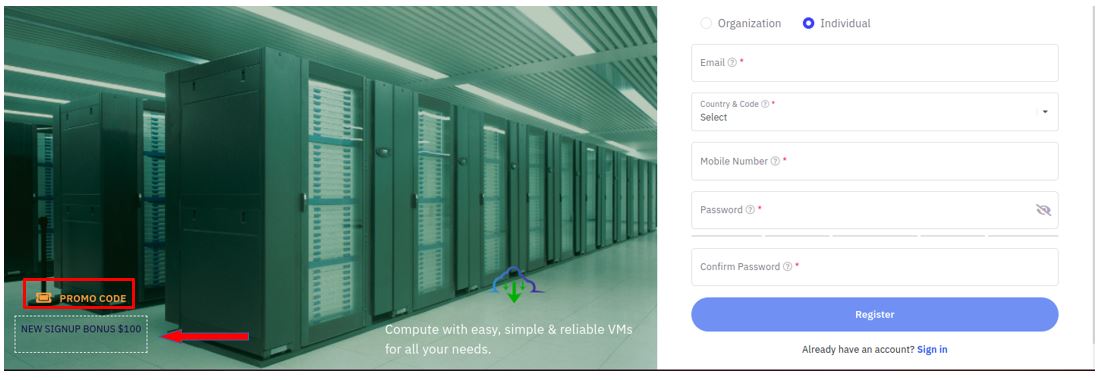
9. User Portal Display :
- You can see the promocode on the user login screen.
Add Promocode using Existing users type:
The EXISTING_USER promocode feature in the admin portal is a powerful tool for offering targeted discounts to current users. You can easily customize the promocode name, set a discount amount, and select specific users who will benefit from the promotion. Optional settings such as automatic acceptance and email notifications enhance the user experience, ensuring they are informed about and can easily take advantage of the offer. This feature is ideal for driving customer loyalty, encouraging additional purchases, and rewarding existing customers for their ongoing support.
Add Promocode using EXISTING USER type:
1. Navigate to the Promocode Section :
-
Login into the admin portal.
-
Then navigate to Billing > Promocode.
-
Once on the Promocode page, you will see the list of existing promo codes and the option to add a new one.
2. Add a New Promocode :
- Click the Add button to create a new promo code.
3. Generate a Default Promocode :
-
A default promocode number will be generated automatically by the system. This is a unique alphanumeric code that will be applied by the users to receive their discount.
-
If you wish, you can edit the promocode name to make it more meaningful or recognizable (e.g., MIDYEARBONUS or SUMMERDISCOUNT). This makes it easier for users to remember and apply the code.
4. Select the Type: EXISTING_USER :
-
In the Type dropdown menu, select EXISTING_USER. This ensures that the promocode will only be available to users who already have an account on the platform.
-
By targeting existing users, you can create campaigns specifically designed for retention, rewarding loyal users, or driving additional purchases.
5. Enter the Discount Amount :
- Enter the discount Amount. This will be a fixed value (e.g., 50).
6. Select the User :
-
You need to select the user for whom this promocode will be valid.
-
You can personalize discounts for specific users as part of targeted campaigns. For instance, you might offer special discounts to high-spending customers or those who haven’t used the platform for some time.
7. Other Settings :
-
Automatically Accept Promocode: Enabling this option means the promocode will be automatically applied for the selected user without them needing to manually input it.
-
Enable Email: If this option is selected, the user will receive an email notification about the availability of the promocode. This is useful for informing users of special promotions or personalized discounts.
8. Save the Promocode :
- Once all the details have been entered, click the add button.
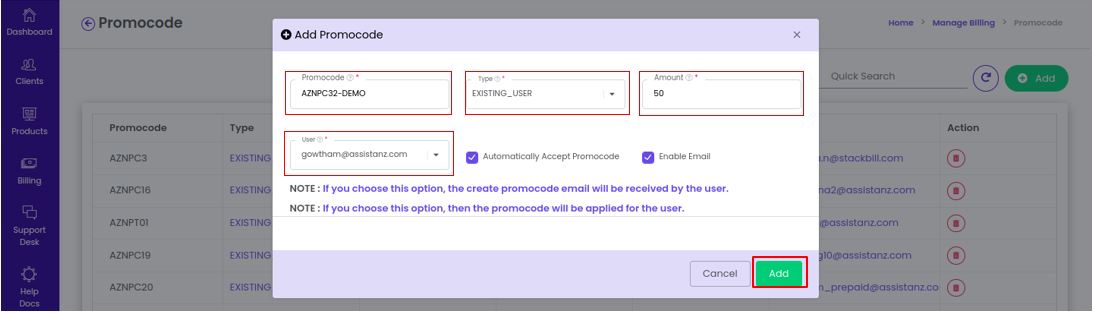
- The new promocode for existing users will be successfully added, and it can now be used by the selected users.

9. User Portal Display :
After the promocode has been created and assigned to a user, they can view and apply it in the user portal.
-
Users should log into their User Portal and navigate to Company > Profile.
-
Once in the profile section, they can find the Credits & Promocode section.
-
This is where users can view any credits or promocodes that have been applied to their account, including the new promocode created for existing users
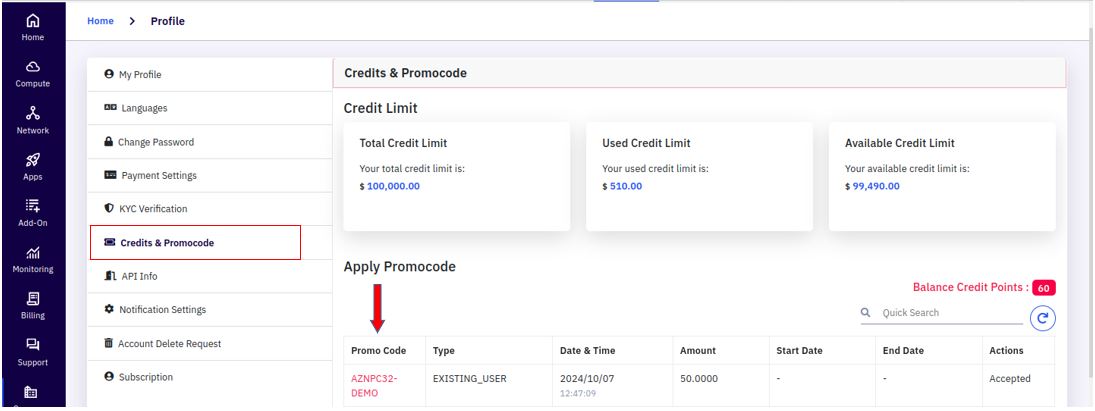
- Users can apply the promocode to their invoices or future purchases if it has not already been automatically accepted.
Promocode options
Editing existing promocode
In the admin portal, the Edit Action for a promocode allows administrators to modify the details of an existing promocode, such as its name, discount amount, validity period, and display text. This is useful when you need to update or adjust a promocode for various reasons, such as extending its validity or modifying the discount amount based on a new promotional campaign.
1. Navigate to the Promocode Section :
-
Login into the admin portal.
-
Then navigate to Billing > Promocode.
-
This will take you to the Promocode Management page, where you can view all current promocodes that have been created.
2. Select the Promocode :
- Find the specific promocode that you want to edit from the list.
- Once you have located the promocode, click on the edit button from the action menu.

3. Edit Promocode Details :
-
Promocode Name: If you want to change the name of the promocode, you can edit it here. This might be useful if you're updating the campaign name or need to make the promocode more user-friendly (e.g., WINTERPROMO).
-
Amount: Update the discount amount for the promocode. You can either increase or decrease the value based on your current marketing or sales strategies.
-
Start & End Date: Change the validity period of the promocode by editing the Start Date and End Date. For instance, if you want to extend a promotion, you can adjust the End Date to a later time.
-
Promocode Display Text: This field allows you to edit the message that will be displayed to users when they see the promocode in the user portal. For example, you might change the text to highlight a new discount or clarify the terms of the offer.
4. Click Update Button :
- Once you have made the necessary edits, click the Update button to save your changes.
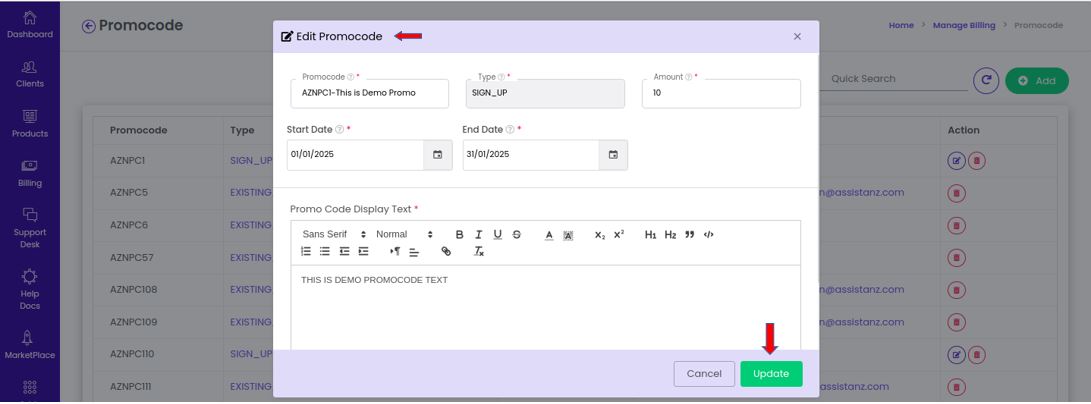

- The portal will confirm that the promocode has been updated successfully.
Deleting a promocode
In the admin portal, the Delete Action allows administrators to permanently remove an existing promocode from the system. This feature is useful when a promocode is no longer needed, has expired, or needs to be discontinued for any reason. Once a promocode is deleted, it will no longer be available for users to apply in the user portal.
1. Navigate to the Promocode Section :
-
Login into the admin portal.
-
Then navigate to Billing > Promocode.
-
This will take you to the Promocode Management page, where you can view all current promocodes that have been created.
2. Select the Promocode :
- Find the specific promocode that you want to delete from the list.
3. Click delete :
-
Once you have located the promocode, click on the delete button from the action menu.
-
This will initiate the deletion process for the selected promocode.
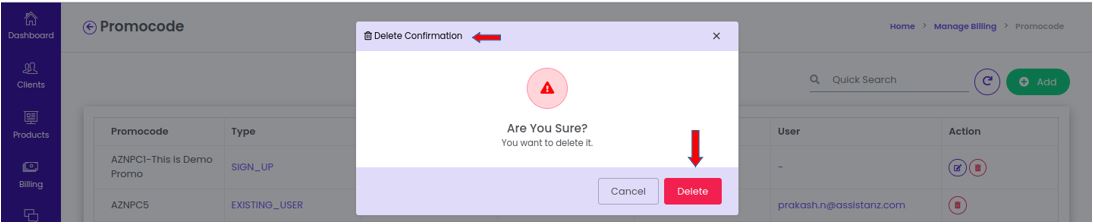
4. Confirm the Deletion :
-
A confirmation dialog box will appear asking if you are sure you want to delete the promocode.
-
To proceed, click the Delete button to confirm your decision. If you decide not to delete it, you can cancel the action at this stage.

5 Promocode Deleted Successfully :
-
After confirming, the system will delete the selected promocode.
-
A success message will be displayed, notifying you that the promocode has been deleted successfully.

- The deleted promocode will no longer be available for customers to use, and it will also be removed from the Promocode Management list.