General
General Configuration
The "General Feature Configuration" section in the admin portal provides a range of settings that enable administrators to control various high-level features available in the Cloud Management Platform (CMP). This section typically includes options for enabling or configuring essential services that impact the overall functionality and integration capabilities of the platform.
These configurations ensure that the CMP is flexible, secure, and capable of supporting a wide range of infrastructure requirements, from API management to dedicated server provisioning and customized access points.
Enable Kong API Gateway Service
The "Enable Kong API Gateway Service" option in the admin portal is a configuration setting that allows administrators to enable or disable the Kong API Gateway for users on the Cloud Management Platform (CMP). Enabling this feature provides enhanced API management capabilities, which are critical for handling, monitoring, and securing API requests.
1. Steps to Enable Kong API Gateway Service :
-
Login into the admin portal.
-
Navigate to the Config section by clicking on the Config icon in the portal menu.
-
Under CMP Config section, click on the Feature Configuration link.
-
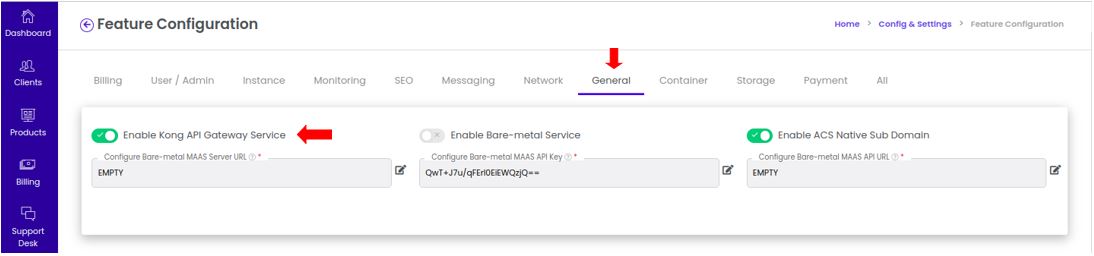
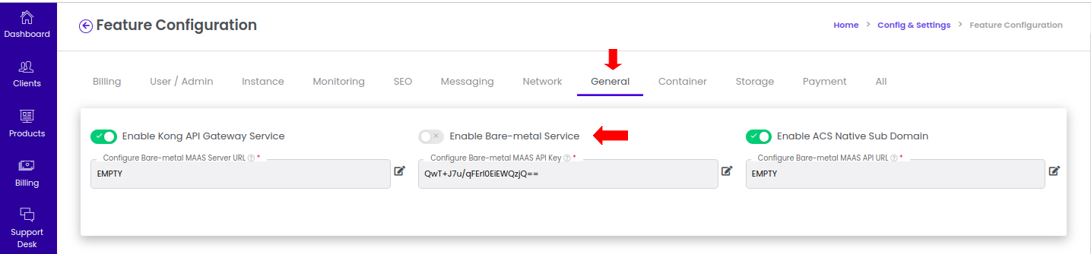
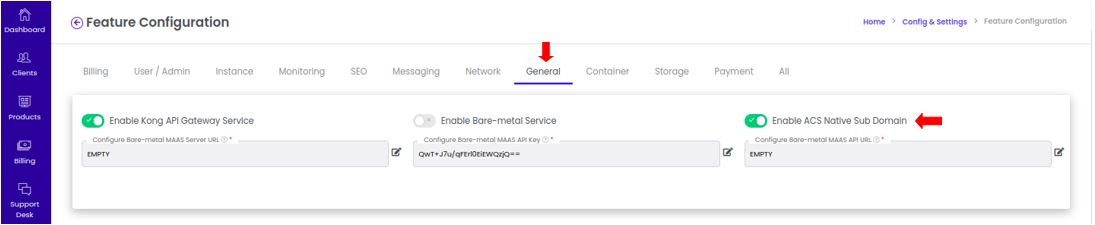
Select the General tab to lists all the general related features available for configuration.
2. Enable or Disable the Feature :
-
Look for the option labeled Enable Kong API Gateway Service in the list of feature configurations.
-
Use the toggle switch to Enable or Disable the Feature.
- The portal will automatically update the changes.
3. Effect in Admin Portal :
-
Login into the Admin Portal.
-
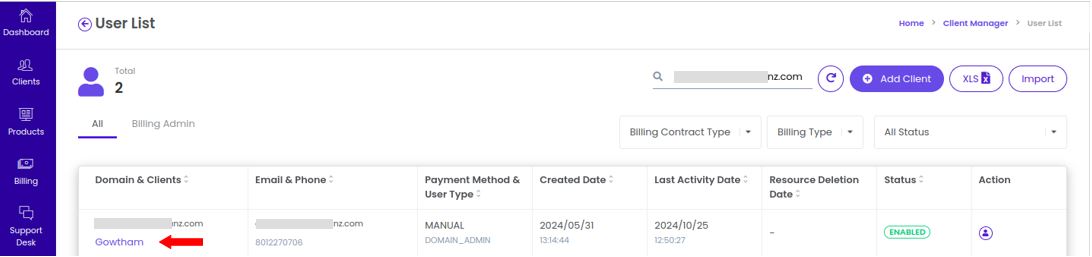
Navigate to Clients in the admin portal and select Create & Manage User Accounts.
-
Choose the specific client for whom you wish to enable the Kong API Gateway.
-
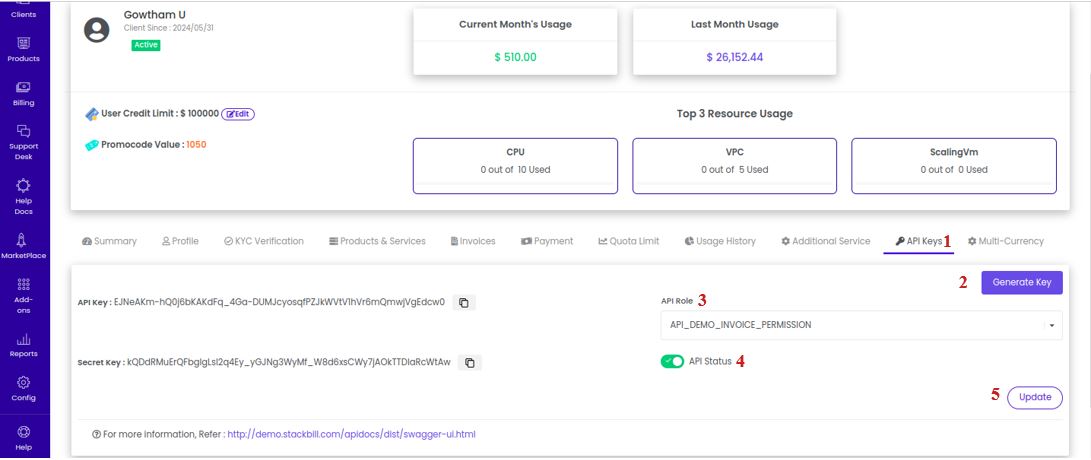
Click the API Keys tab to configure API-related settings for the selected client.
-
Click the Generate Key button to create a new API key for the user.
-
Choose the appropriate permissions and access levels that the API key will have.
-
This setting will activate the API key for use.
-
Once the configurations are completed, click the Update button to save the settings.
3. Effect in User Portal :
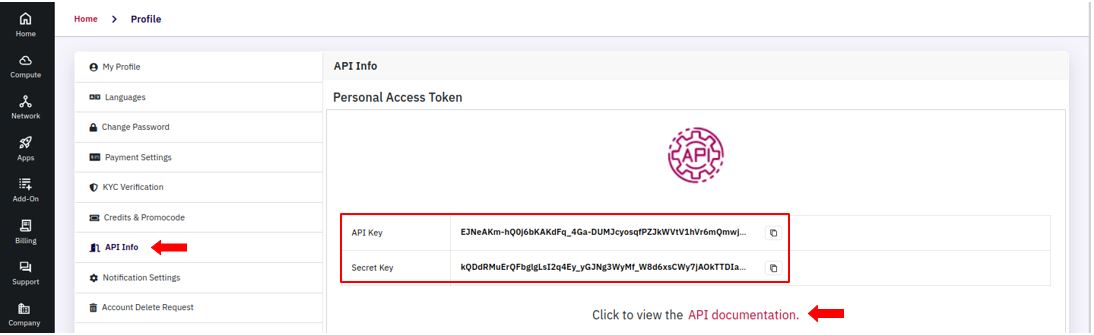
- Navigate to User Portal > Company > Profile > API Info in the user portal.
-
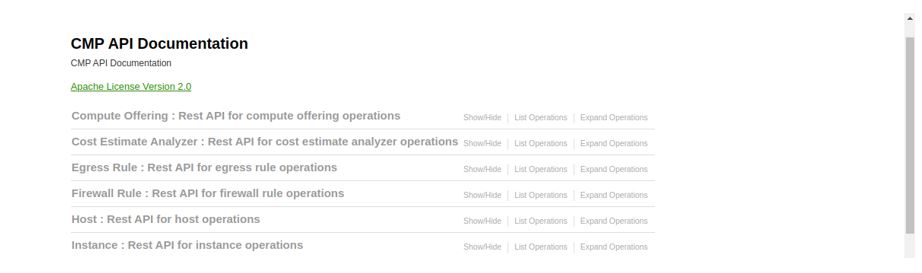
Users can click on the API documentation link to view the available APIs, along with detailed usage instructions.
-
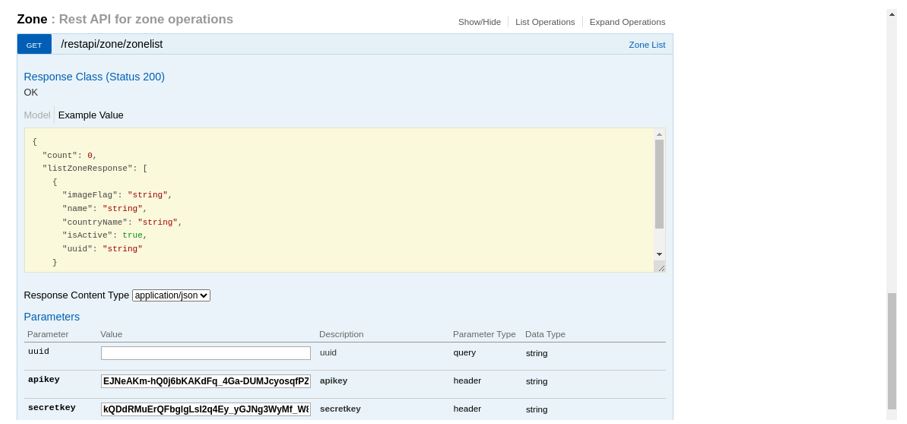
The documentation link serves as a reference for users, enabling them to understand the structure and functionality of each API endpoint.
-
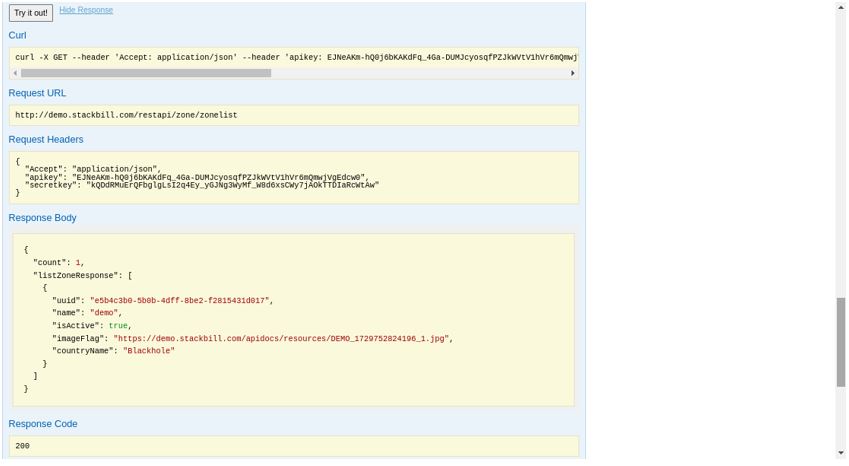
Users can test API requests directly from the documentation interface.
-
For instance, if they want to retrieve a list of available zones, they can click the Try it out button next to the "Zone List" endpoint. This allows users to see a sample response from the API, ensuring that they understand the output and behavior of the API before integrating it with their applications.
Enable Bare-metal Service
Bare-metal Service refers to the capability to provision and manage bare-metal servers in the CMP, which are physical servers dedicated to a single user or tenant, unlike virtual machines (VMs) that share resources on a single host. Bare-metal servers provide higher performance, predictable workloads, and security advantages since they do not rely on a hypervisor or shared resources.
1. Steps to Enable Bare-metal Service :
-
Login into the admin portal.
-
Navigate to the Config section by clicking on the Config icon in the portal menu.
-
Under CMP Config section, click on the Feature Configuration link.
-
Select the General tab to lists all the general related features available for configuration.
2. Enable or Disable the Feature :
-
Look for the option labeled Enable Bare-metal Service in the list of feature configurations.
-
Use the toggle switch to Enable or Disable the Feature.
-
Also you need to specify the MAAS API Key and MAAS API URL to complete the configuration
- The portal will automatically update the changes.
3. How it works:
- To learn more about MAAS service configuration, visit this URL: https://maas.io/docs.
Enable ACS Native Sub Domain
The "Enable ACS Native Sub Domain" option in the admin portal is a configuration setting that allows administrators to control whether users on the Cloud Management Platform (CMP) have the ability to create and manage subdomains under the main domain. Subdomains can be an effective way to organize content and separate different functions within an organization, like creating distinct sections for blogs, stores, support pages, or other services. Enabling this option can be helpful for businesses looking to provide more structured navigation and customized offerings for their users.
1. Steps to Enable ACS Native Sub Domain :
-
Login into the admin portal.
-
Navigate to the Config section by clicking on the Config icon in the portal menu.
-
Under CMP Config section, click on the Feature Configuration link.
-
Select the General tab to lists all the general related features available for configuration.
2. Enable or Disable the Feature :
-
Look for the option labeled Enable ACS Native Sub Domain in the list of feature configurations.
-
Use the toggle switch to Enable or Disable the Feature.
- The portal will automatically update the changes.
3. Effect in User Portal :
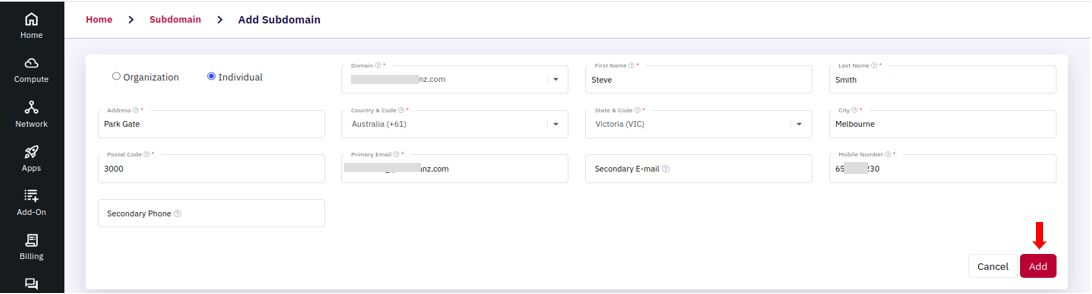
- Navigate to User Portal > Company > Subdomain
-
Users can enter the required fields, such as the subdomain name and additional configuration details.
-
After filling in the mandatory fields, they can click the Add button to create the new subdomain.
