Network
Network Configuration
This feature allows the creation of different types of networks within the Cloud Management Portal (CMP). These options give administrators flexibility in managing network features and security configurations within the Cloud Management Portal, enabling them to tailor the networking environment to meet specific organizational needs.
Enable Shared Network Creation
The "Enable Shared Network Creation" feature in the admin portal provides administrators with control over the ability to create shared networks within the Cloud Management Platform (CMP). Shared networks are a type of network configuration that allows multiple virtual machines (VMs) belonging to different user accounts or tenants to connect to the same network.
1. Steps to Enable Shared Network Creation :
-
Login into the admin portal.
-
Navigate to the Config section by clicking on the Config icon in the portal menu.
-
Under CMP Config section, click on the Feature Configuration link.
-
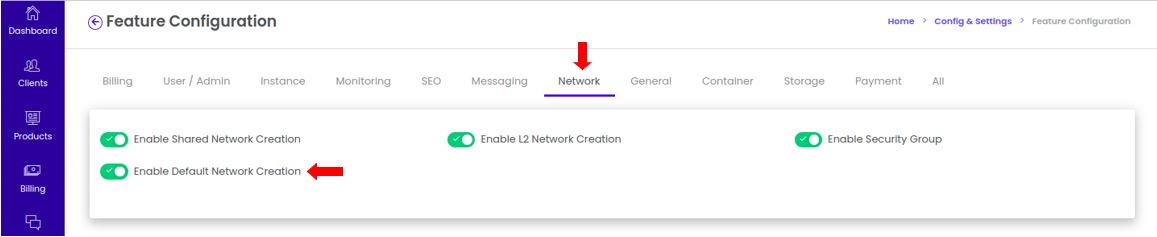
Select the Network tab to lists all the network related features available for configuration.
2. Enable or Disable the Feature :
-
Look for the option labeled Enable Shared Network Creation in the list of feature configurations.
-
Use the toggle switch to Enable or Disable the Feature.

- The portal will automatically update the changes.
3. Effect in User Portal :
-
If this option is enabled in the admin portal, administrators and authorized users in the root user group will have the ability to create shared networks from the CMP.
-
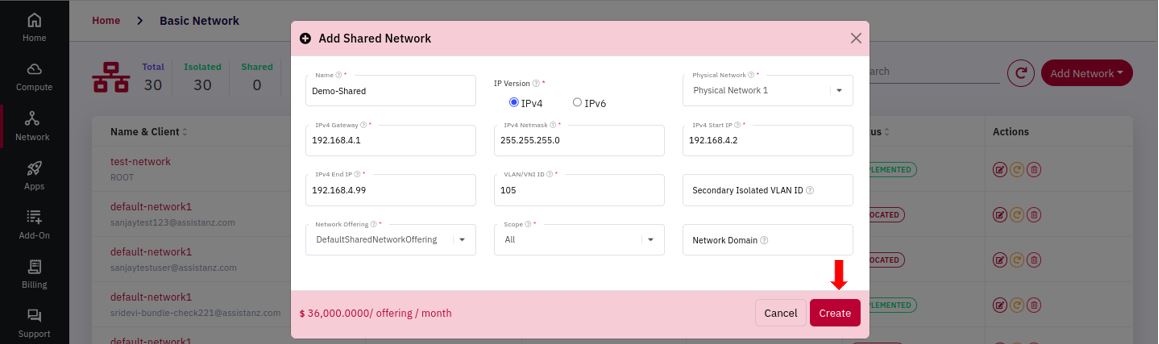
Navigate to User portal > Network > Basic Network > Add Network > Add Shared Network
-
Administrators must fill in mandatory fields such as the network name, description, IP range, and any other necessary parameters that define the network configuration.
-
After entering the required details, click the Create button to complete the network setup.
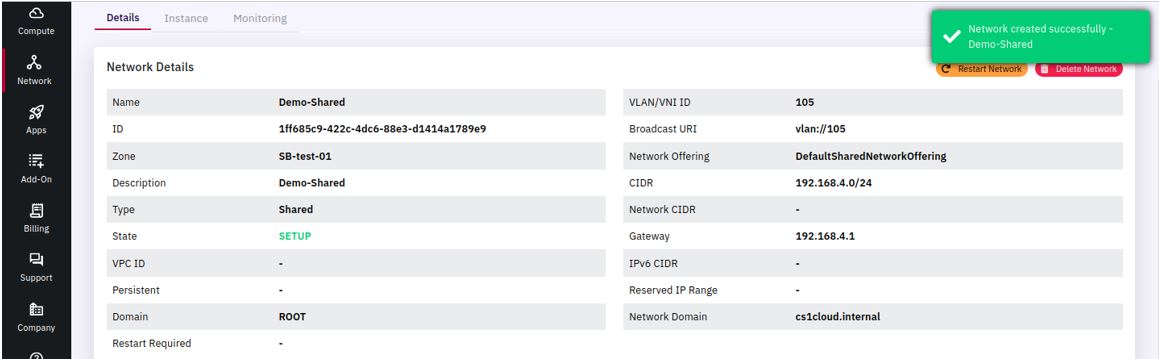
- Once created, the shared network will be available and accessible to instances across different user accounts, provided they have been configured to join the shared network.
Enable L2 Network Creation
The "Enable L2 Network Creation" feature in the admin portal allows administrators to control whether users can create Layer 2 (L2) Networks within the Cloud Management Platform (CMP). L2 networks are simple, isolated networks that do not provide additional network services, such as routing or DHCP.
1. Steps to Enable L2 Network Creation :
-
Login into the admin portal.
-
Navigate to the Config section by clicking on the Config icon in the portal menu.
-
Under CMP Config section, click on the Feature Configuration link.
-
Select the Network tab to lists all the network related features available for configuration.
2. Enable or Disable the Feature :
-
Look for the option labeled Enable L2 Network Creation in the list of feature configurations.
-
Use the toggle switch to Enable or Disable the Feature.
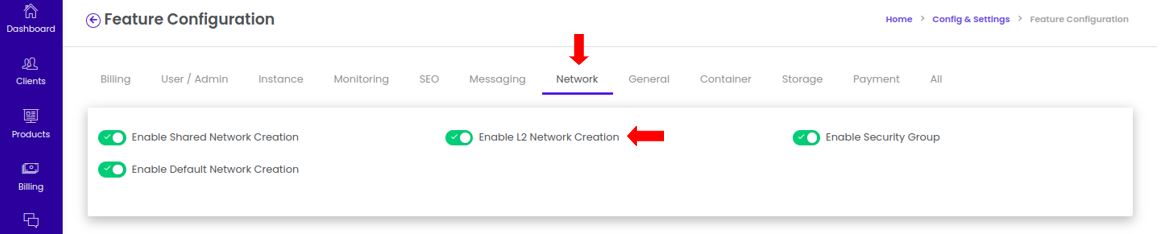
- The portal will automatically update the changes.
3. Effect in User Portal :
-
Navigate to User Portal > Network > Basic Network > Add Network > Add L2 Network
-
The user needs to fill in mandatory fields such as network name, Network Offering, Attach to an Instance.
-
After entering the required details, click the Create button to initiate the L2 network creation process.

- Once the network is successfully created, it will be available for use, allowing VMs to be connected to the L2 network as per the configuration.

Enable Security Group
The "Enable Security Group" feature in the admin portal allows administrators to control whether users can create Security Groups in the Cloud Management Platform (CMP) portal. Security groups are a critical aspect of network security as they enable the isolation of network traffic to and from instances.
1. Steps to Enable Security Group :
-
Login into the admin portal.
-
Navigate to the Config section by clicking on the Config icon in the portal menu.
-
Under CMP Config section, click on the Feature Configuration link.
-
Select the Network tab to lists all the network related features available for configuration.
2. Enable or Disable the Feature :
-
Look for the option labeled Enable Security Group in the list of feature configurations.
-
Use the toggle switch to Enable or Disable the Feature.
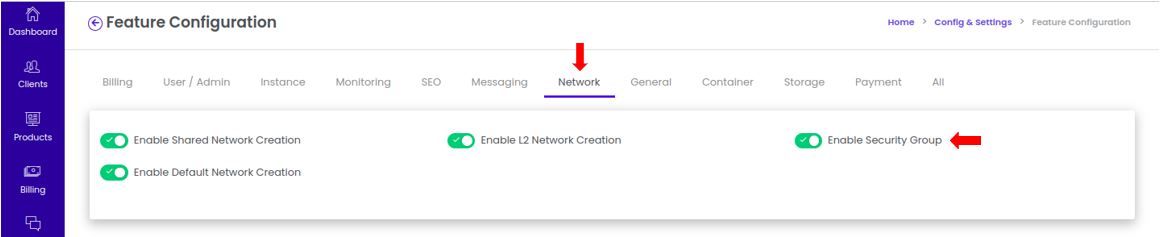
- The portal will automatically update the changes.
3. Effect in User Portal :
-
Navigate to User Portal > Network > Security Group > Add
-
The user will need to fill in mandatory fields such as the security group name, description, and any initial ingress rules they want to set.
-
For example, user might create an ingress rule that only allows traffic on port 80 (HTTP) from specific IP addresses.
-
Once the details are filled in, click the Create button to create the security group.
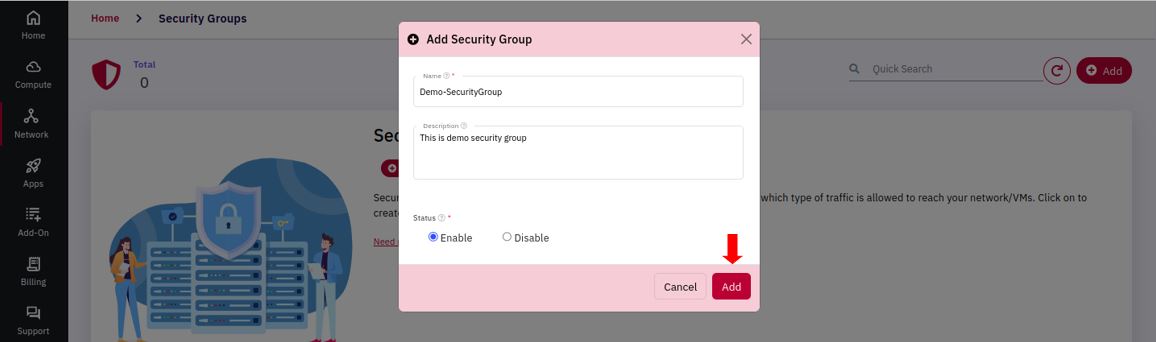
- After successfully creating the security group, it will be available for selection and association with instances, enabling users to control the network traffic for their VMs based on the defined rules.

Enable Default Network Creation
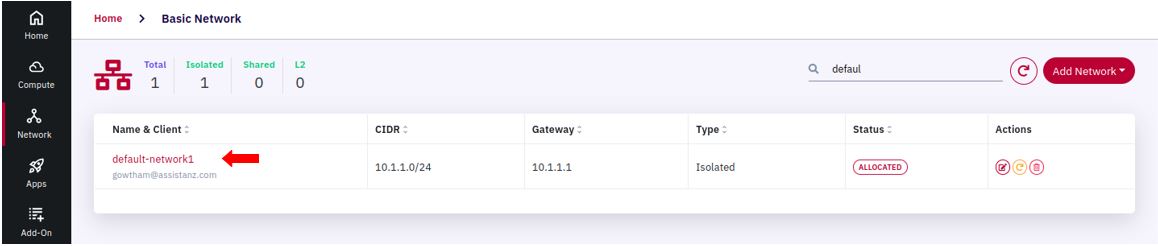
The "Enable Default Network Creation" feature in the admin portal allows administrators to control whether a default network (also known as a basic network) is automatically created when users initiate the instance creation process. This network serves as the foundational or primary network configuration that instances will use unless otherwise specified.
1. Steps to Enable Default Network Creation :
-
Login into the admin portal.
-
Navigate to the Config section by clicking on the Config icon in the portal menu.
-
Under CMP Config section, click on the Feature Configuration link.
-
Select the Network tab to lists all the network related features available for configuration.
2. Enable or Disable the Feature :
-
Look for the option labeled Enable Default Network Creation in the list of feature configurations.
-
Use the toggle switch to Enable or Disable the Feature.
- The portal will automatically update the changes.
3. Effect in User Portal :
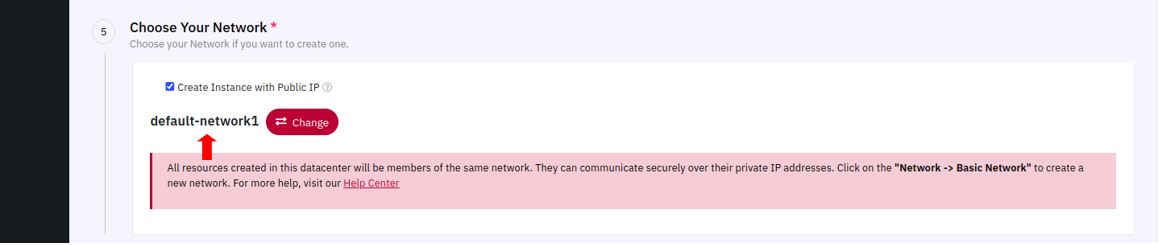
- Navigate to User Portal > Compute > Instance > Add Instance > Quick / Advanced Deploy > Choose Your Network
-
During the instance creation process (either through Quick Deploy or Advanced Deploy options), if the default network creation option is enabled, a basic network will automatically be created and associated with the instance.
-
Users may still have the option to choose an alternative network if they prefer a different network configuration. However, the default network will be the pre-selected option, making it easy to proceed with the standard setup.
- Upon finalizing the instance creation, the instance will be launched within the default network, providing basic connectivity without requiring additional network setup from the user.